StateX — Story 3
A built-in InheritedWidget for efficient UI
In this article, Part 3 of 4, we’ll learn more about the state_extended package and its built-in InheritedWidget. We’ll again rely on the package’s example apps to do this. Below is a screenshot of the StatefulWidget, HomePage. Now, this is very much your run-of-the-mill StatefulWidget. The one lone instance variable is set final (the formal parameter, title), and the createState() function instantiates a private State object, _HomePageState. Nothing new.
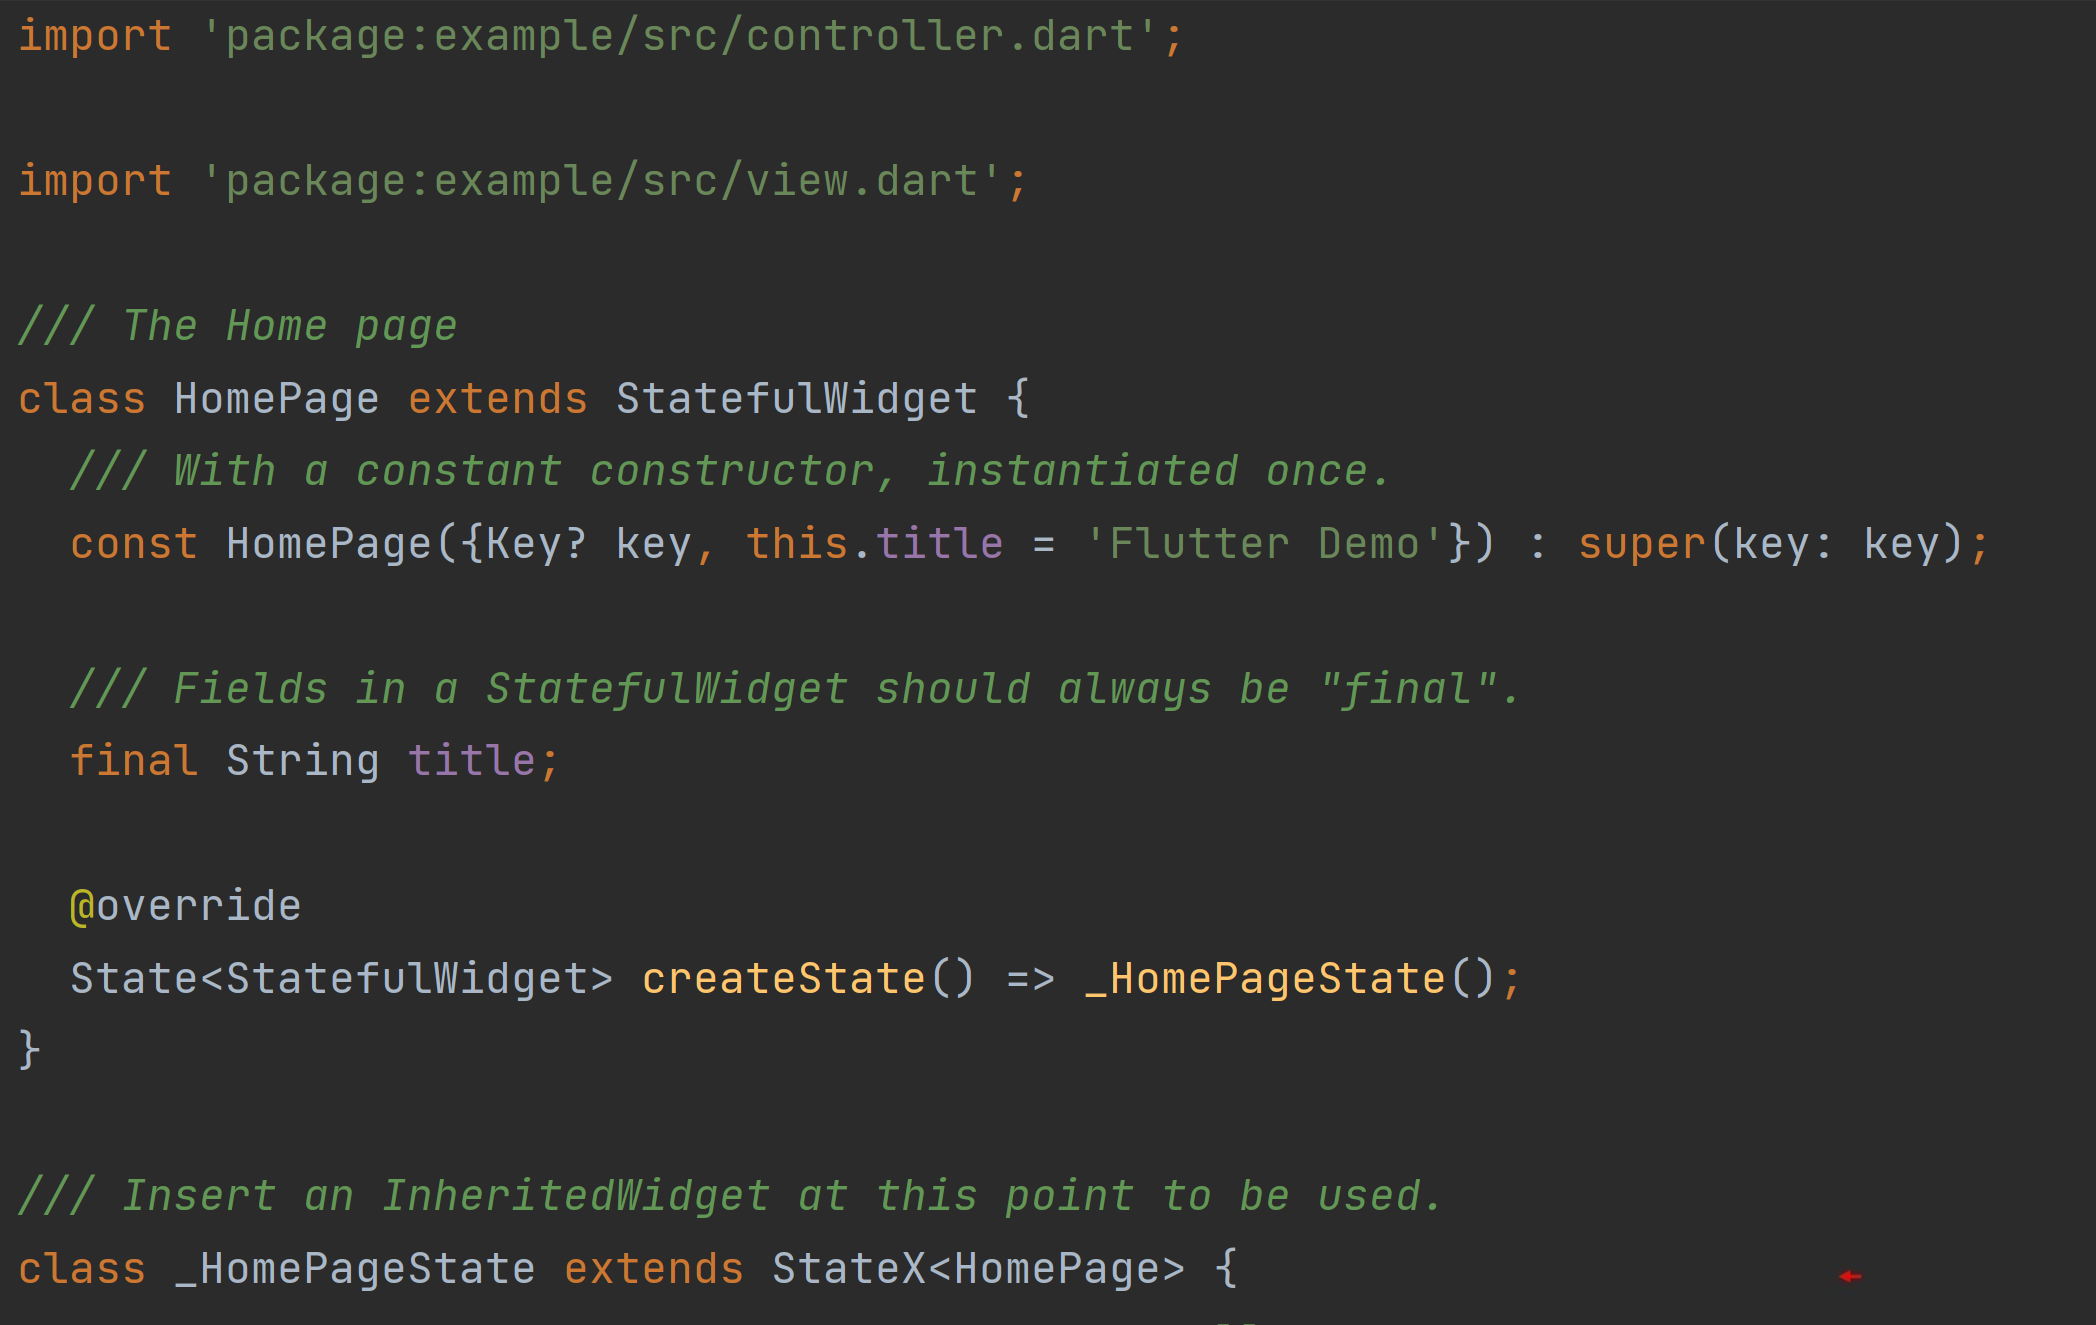

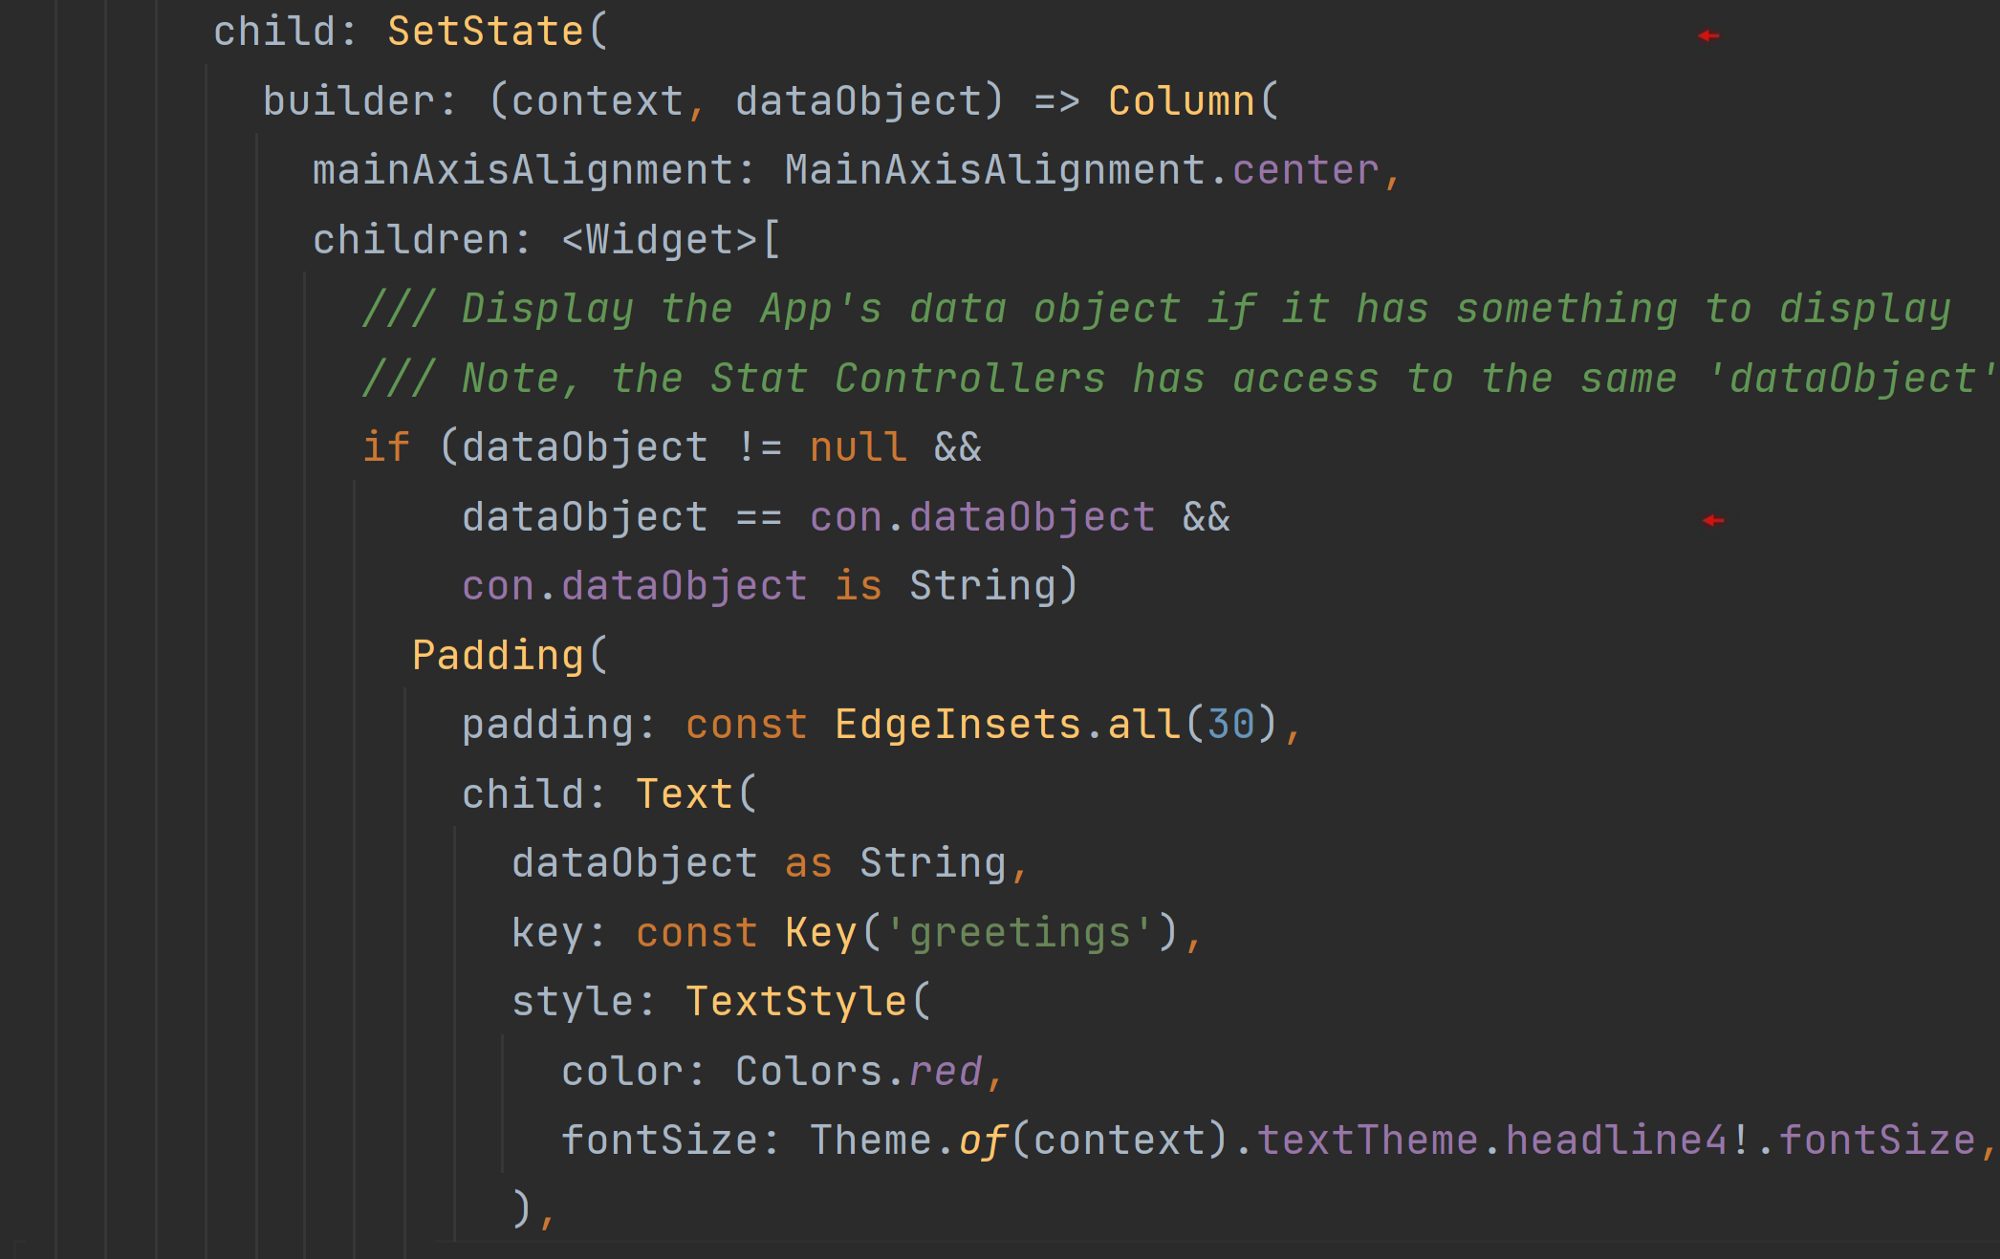
In the second screenshot above, we see the class, _HomePageState, is extending the StateX class. Ok, fine. Further, it has a constructor that takes in one object simply named, Controller, as intended. Next, you’ll see from the video below, that this example app has a series of greetings flashing along in red. Interesting. What’s all that about? With that, it’s when we reach the build() function, we see a variation from the norm. Did you see the SetState() class below? It too is from the state_extended package and has a ‘widget builder’ passed to the parameter, builder. Instead of ‘repainting’ the whole screen with every tap of the button, only the count value and the red-letter greetings are being rebuilt — leaving the rest of the interface untouched.
Note an interesting if-statement is highlighted below excluding a Padding widget from the Column widget’s List object until the property, dataObject, contains one of those greetings I mentioned earlier: if (con.dataObject != null && con.dataObject is String).When it does, a greeting is displayed in red. You can inundate a ‘column list’ with if-statements so as to only display certain entries under certain conditions. We’ll continue this article with how this is implemented with an InheritedWidget.
I Like Screenshots. Tap Caption For Gists.
As always, I prefer using screenshots in my articles over gists to show concepts rather than just show code. I find them easier to work with frankly. However, you can click or tap on their captions to see the code in a gist or in Github. Tap or click on the screenshots themselves to zoom in on them for a closer look. With that, you’ll find it best to read this article about mobile development on your computer than on your phone.
No Moving Pictures, No Social Media
There will be gif files in this article demonstrating aspects of the topic at hand. However, it’s said viewing such gif files is not possible when reading this article on platforms like Instagram or Facebook. They may come out as static pictures or simply blank placeholders. Please, be aware of this and maybe read this article on medium.com or on their own app.
Let’s continue.

Granted, this is a very simple example app, but at least the FloatingActionButton is not being rebuilt every time the button is tapped — unlike Flutter’s traditional counter app. The SetState object is passed a BuildContext object, context, and the ‘data object’, dataObject. This may remind you of the Scoped Model framework and its ScopedModelDescendant class that sends an ‘object’ down the widget tree. As it happens, it involves an InheritedWidget as well. Lastly, note there’s a free article about the InheritedWidget if you want to read up more on the widget.

Inherit The State
Now, you’re not confined to the SetState class. All that’s needed is to mark a Widget as a dependency to an InheritedWidget somewhere, and you’re then able to achieve spontaneous and meticulous ‘rebuilds’ here and there on your Flutter app’s interface — in my opinion, the only real reason you would ever want to use an InheritedWidget.
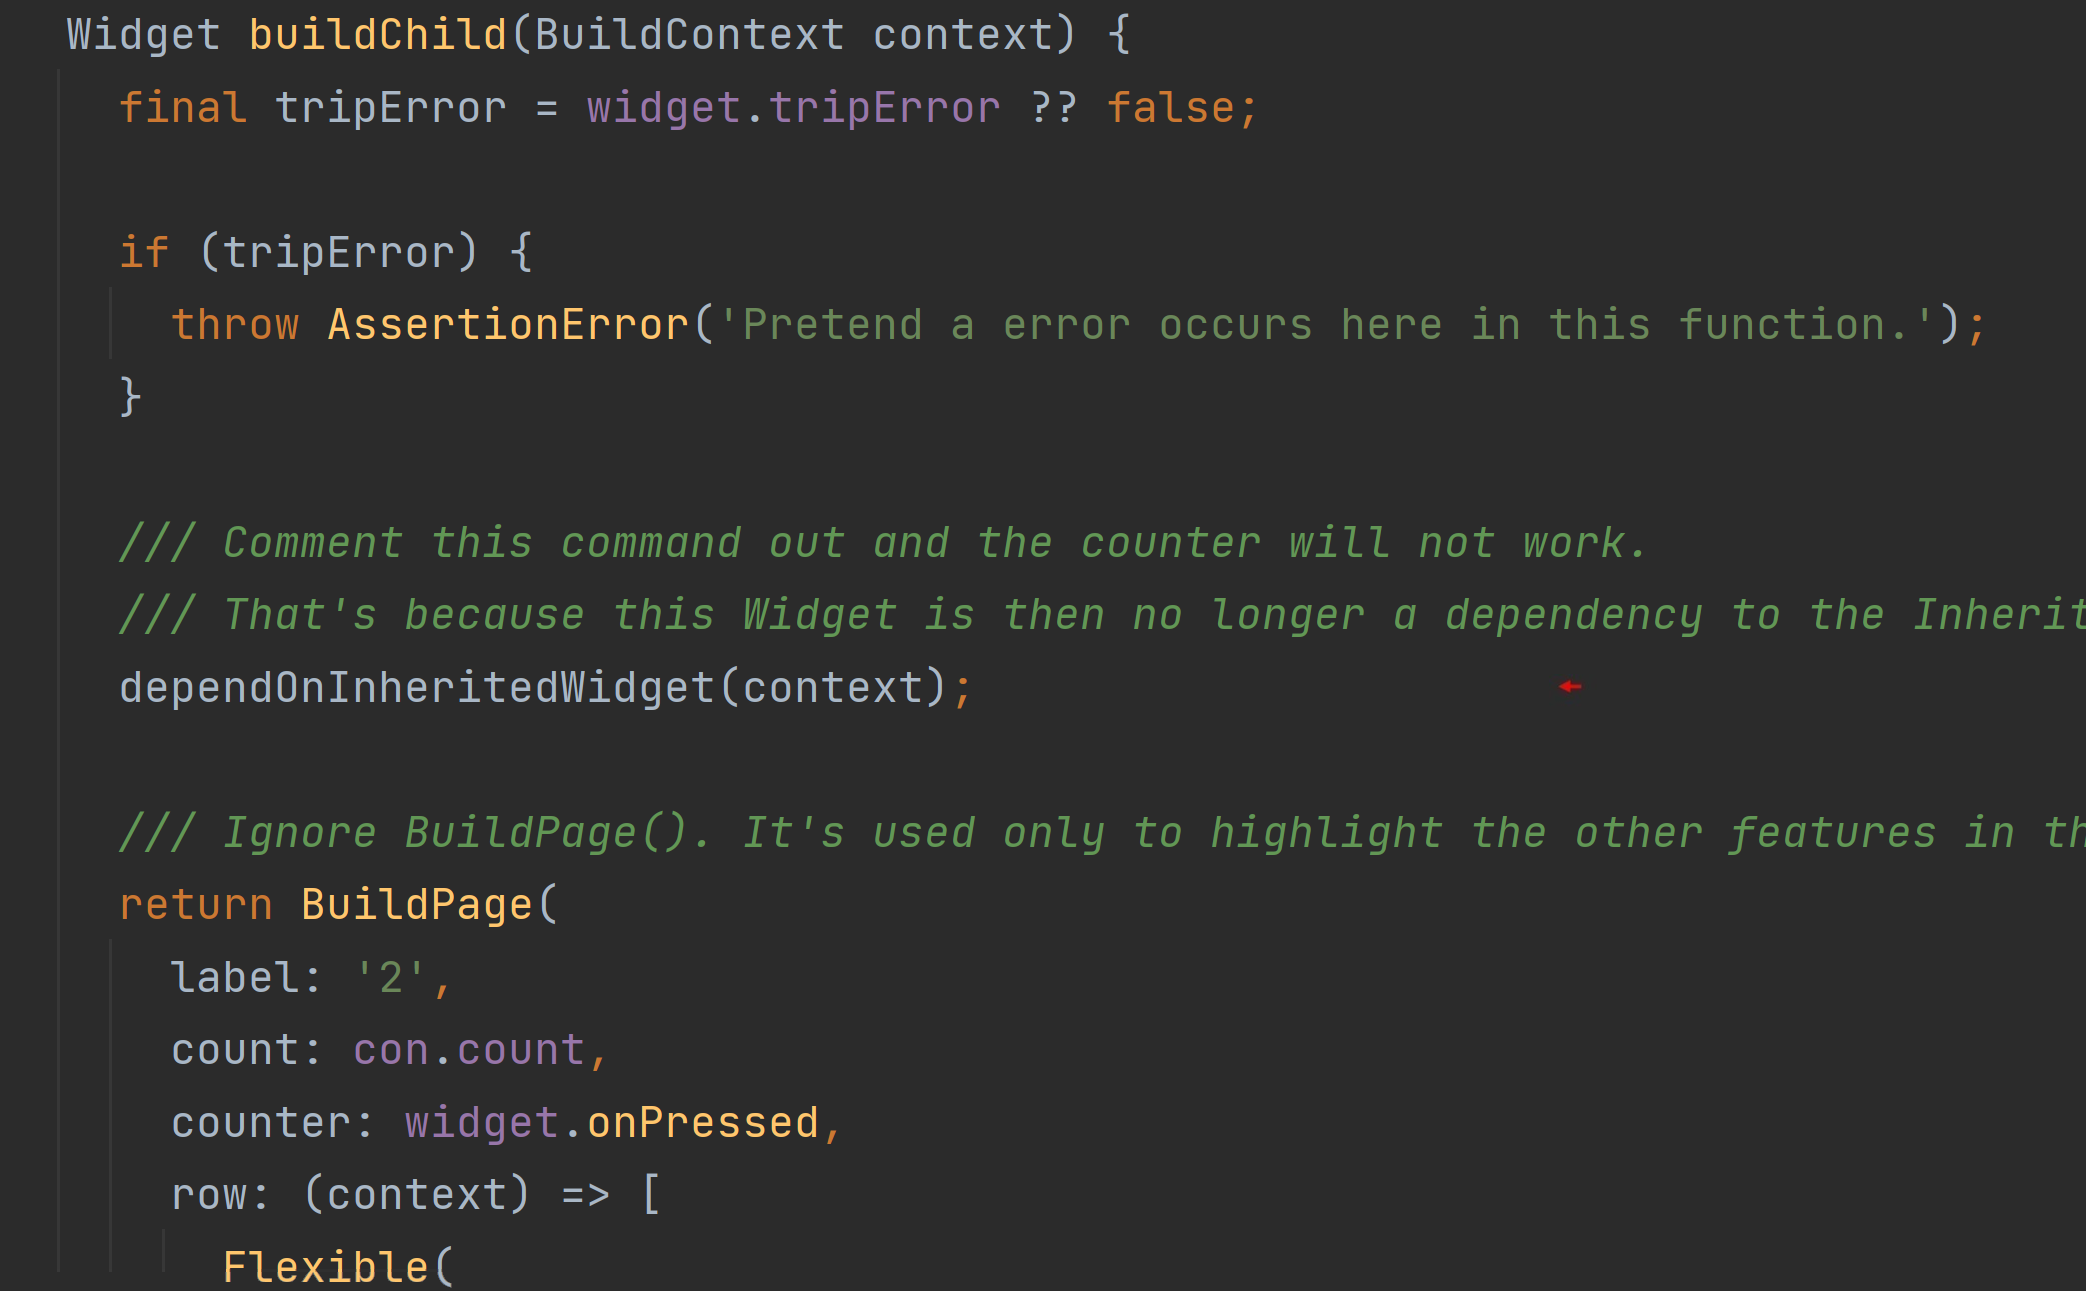
Below is a screenshot of the ‘Page 1’ State object again. Although I’ve commented out the setState() function, to our surprise, the counter will continue to work. See the gif file below. In the second screenshot below, you see the line, dependOnInheritedWidget(context), is highlighted with a red arrow. You see, that line has marked the Widget (represented by the contextvariable) as a dependency to an InheritedWidget.
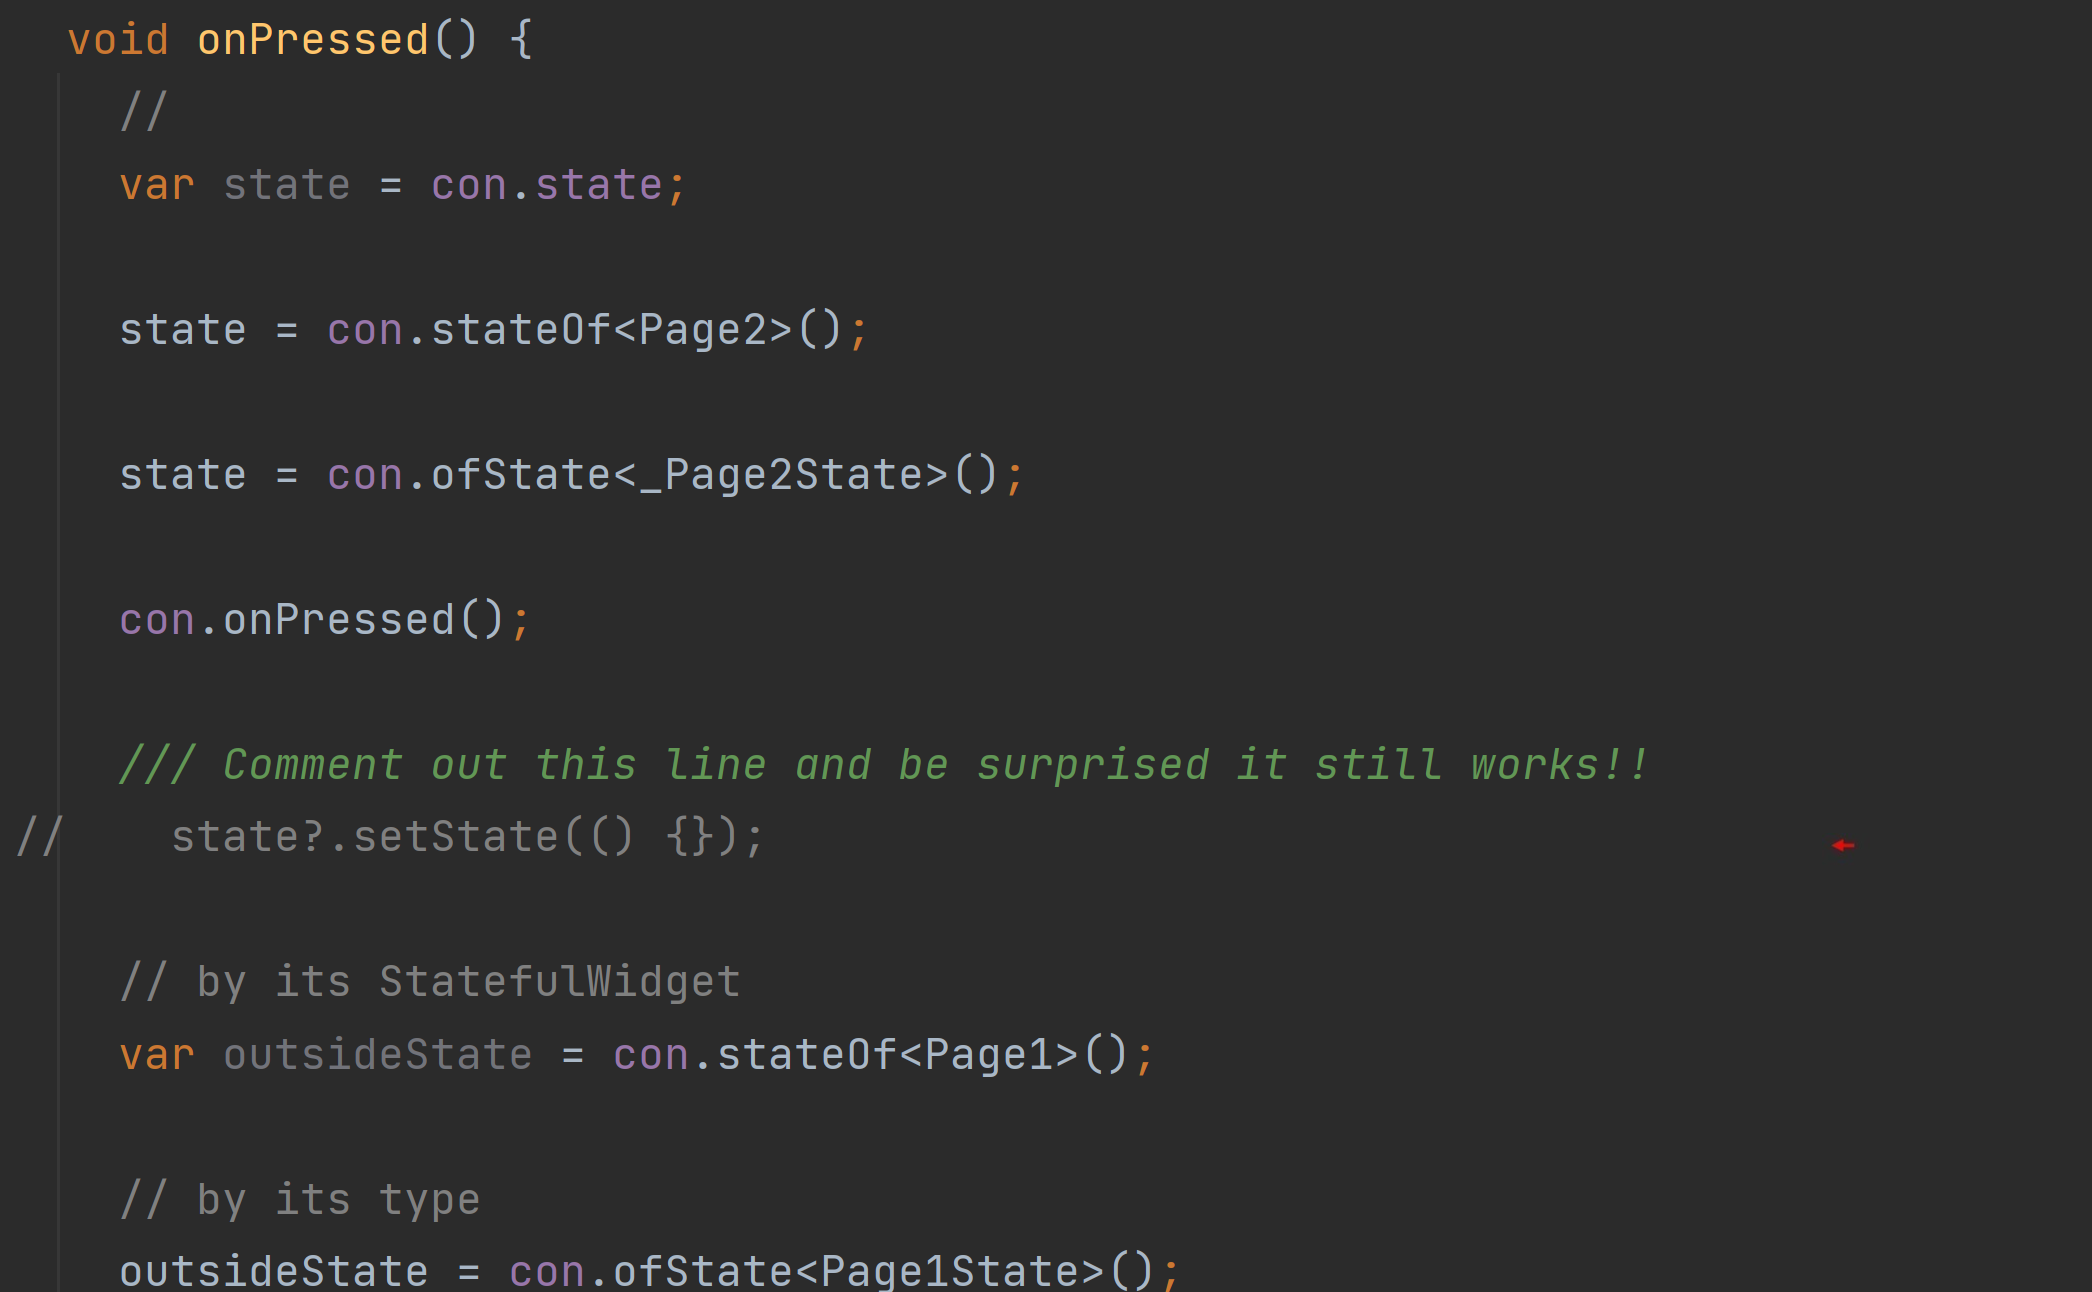

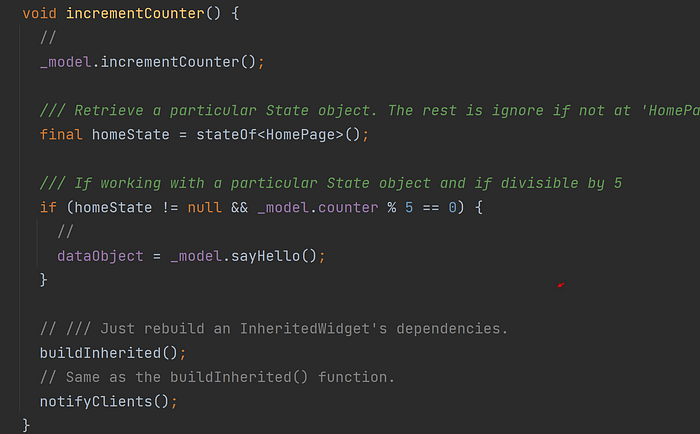
The setState() function is commented out, but the line, con.onPressed(), continues, as you see in the screenshot below, to call the incrementCounter() with every tap of the button. You can see there that the function, notifyClients(), is being called to again run the builder inside the SetState class and display the newly incremented counter. Do you see that?
Instead of recreating the whole screen, the notifyClients() function will just call this one build function — the one with the lone command, dependOnInheritedWidget(context). Place that command in any other build() function you want to execute again and again, and only those build() functions will be called. Brilliant! Nothing like adding a bit of efficiency to your app.
A Meet and Greet
There will be a new greeting every time the counter is divisible by 5. And so, with every such divisible count, the function, sayHello(), in the Model class is called. See below. A visit to the Model class shows us the code involved in supplying those various greetings. We see the function in question dedicates an index of type integer to traverse the length of a List object returning its content.
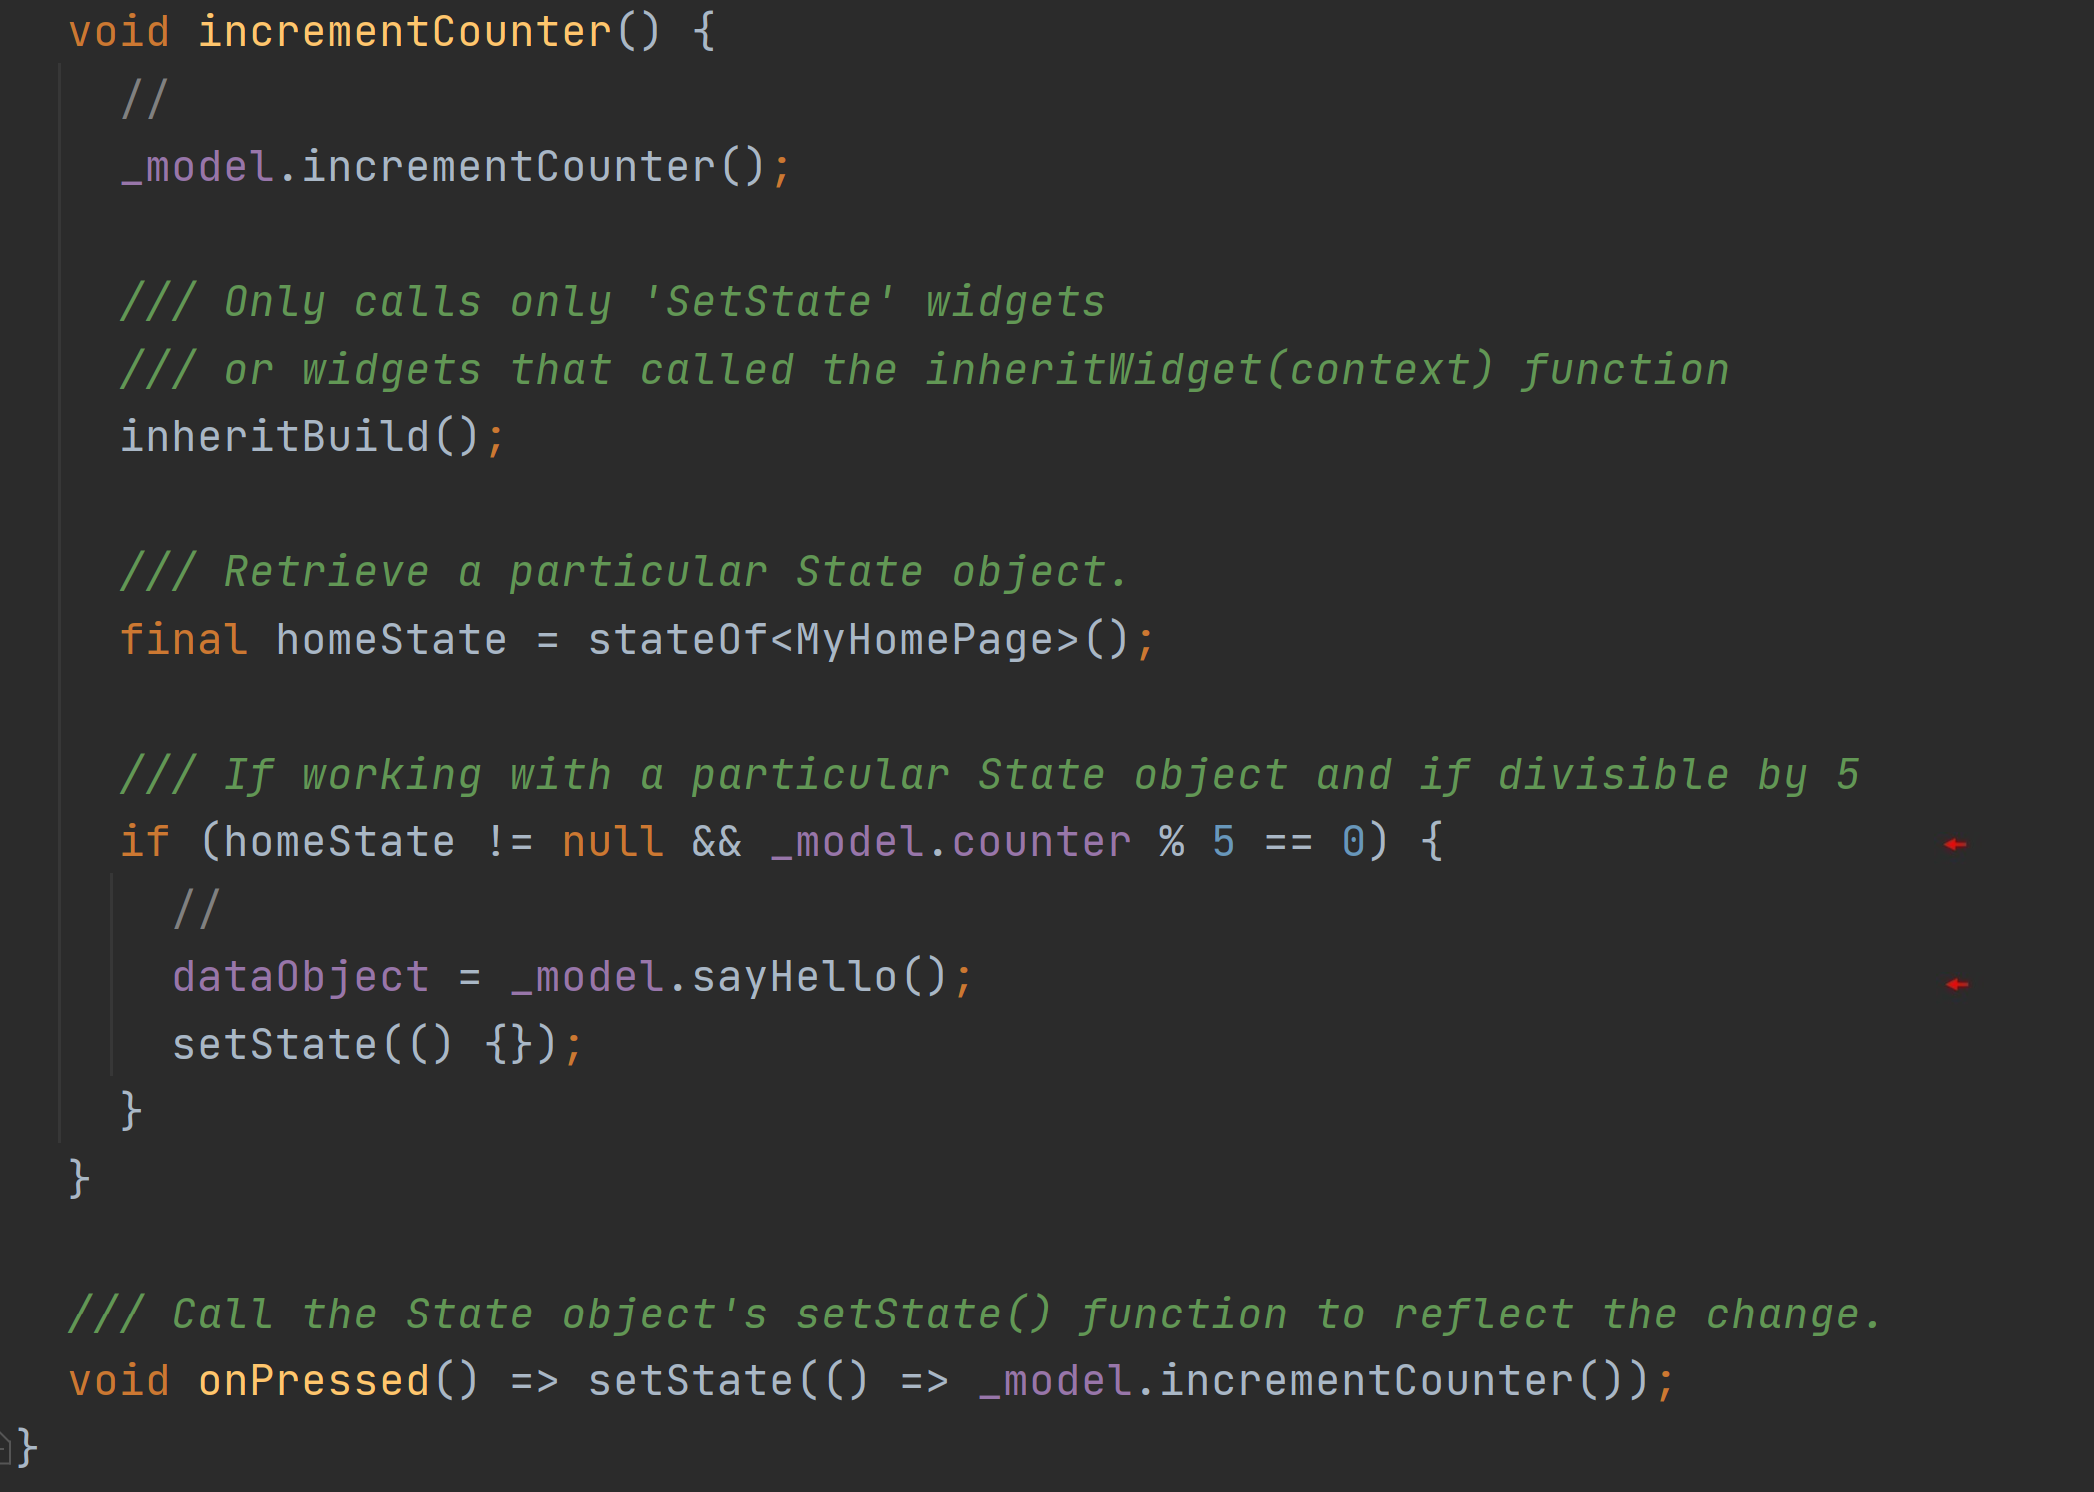
You can’t reverse the value, you can’t explicitly set it to any value. You can only retrieve the value using a particular getter, integer get counter => _counter; , or increase the value by calling the function, incrementCounter(). In other words, access and manipulation of the data inside this class are controlled. This is a good practice for any sound developer.
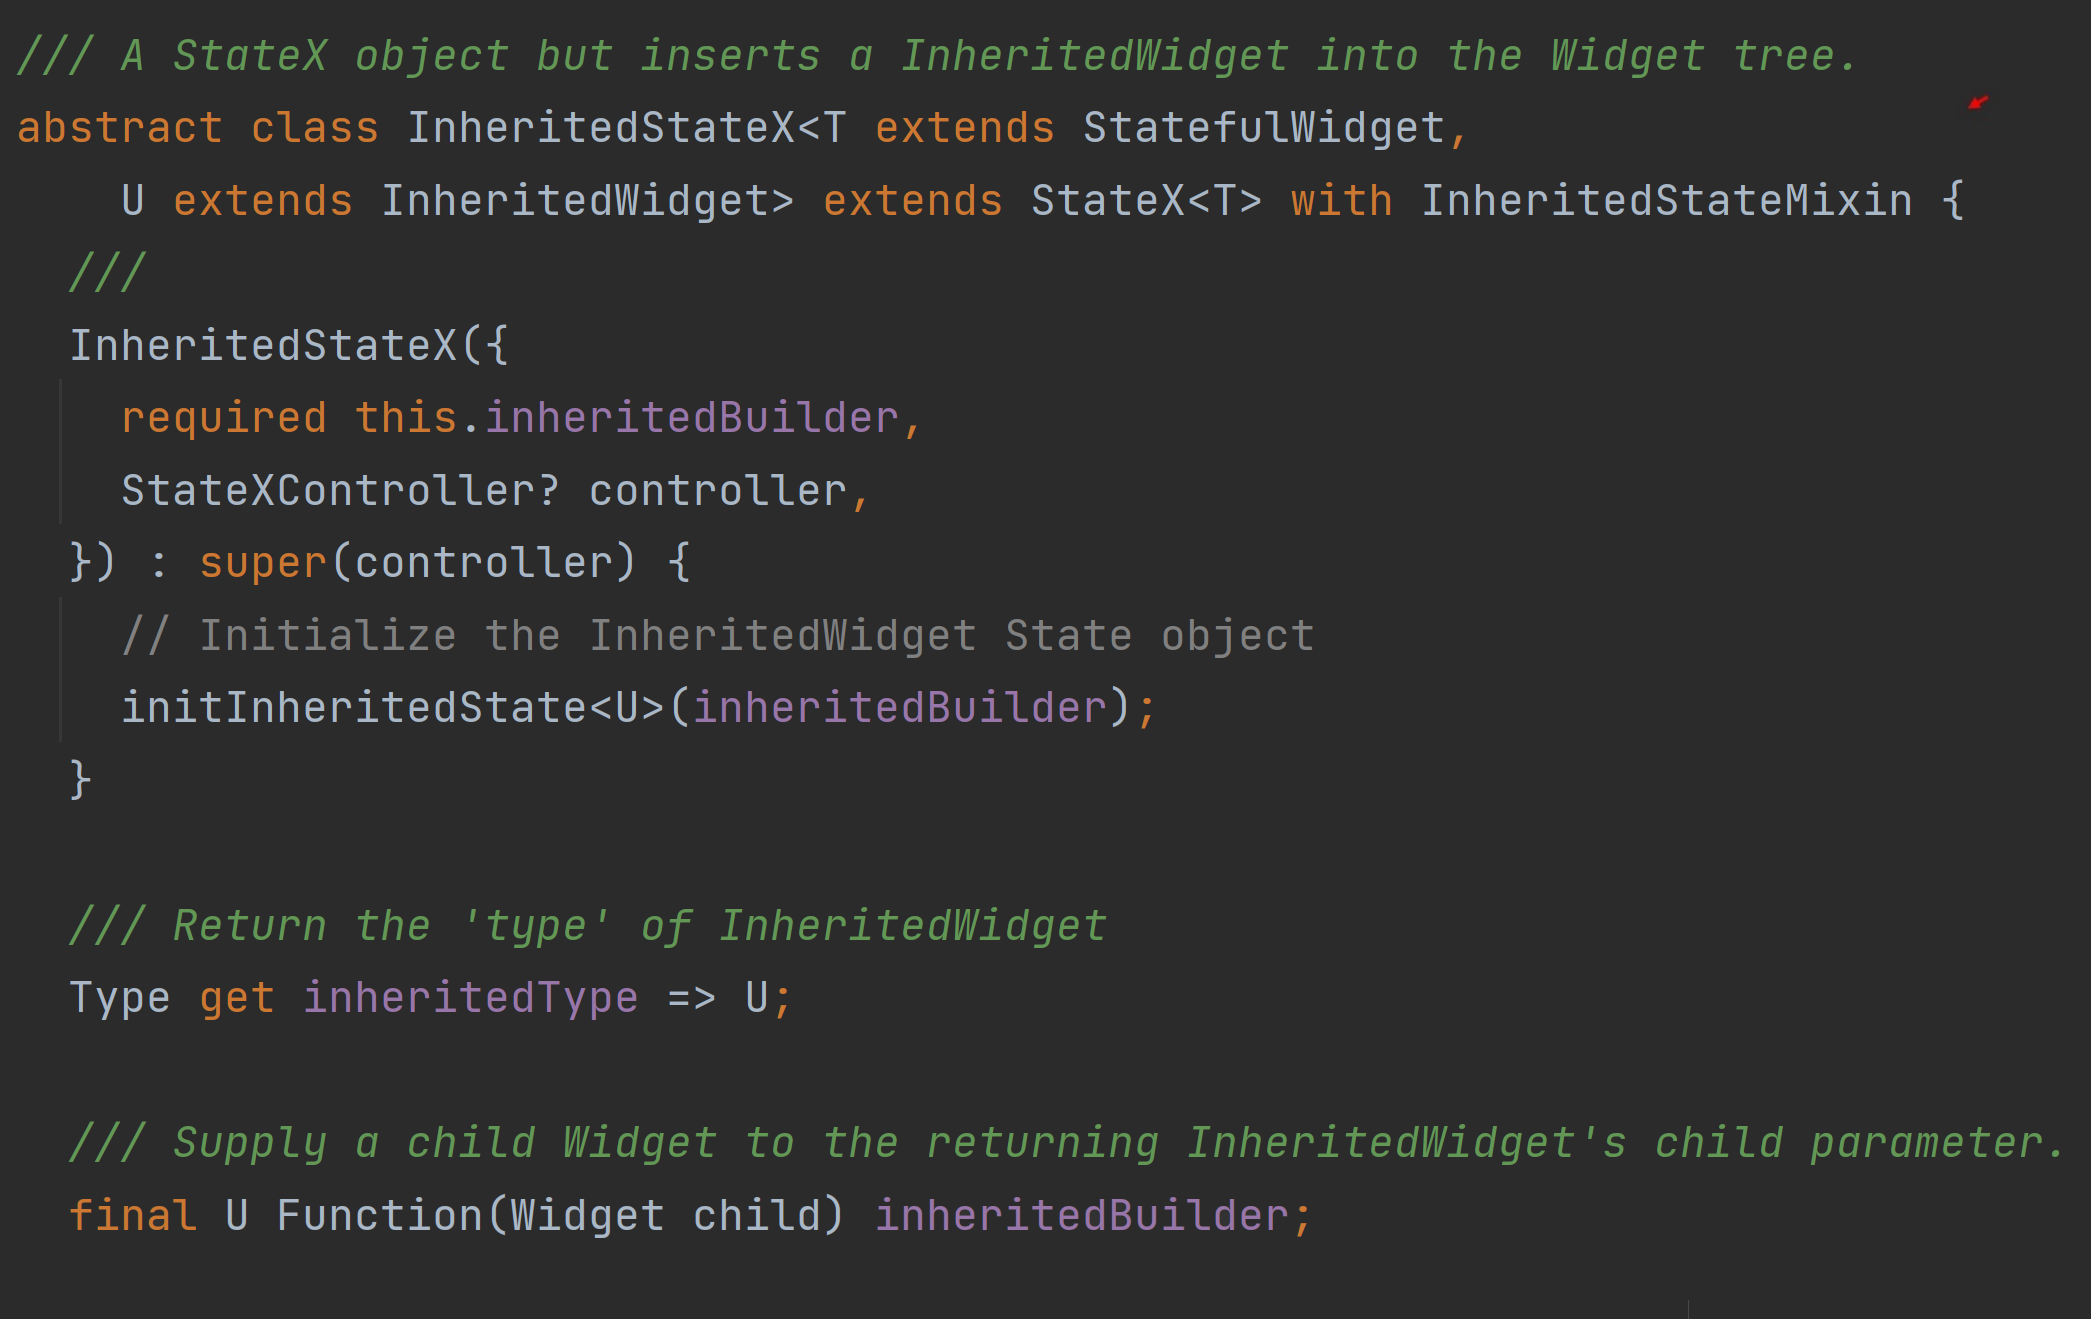
It’s included in the state_extended package and is a subclass of the InheritedStateX class which, in turn, is a subclass of the StateX class. As such, this allows your app to either utilize a built-in FutureBuilder, a built-in InheritedWidget, or both or neither. You’ve options. Gotta love options.
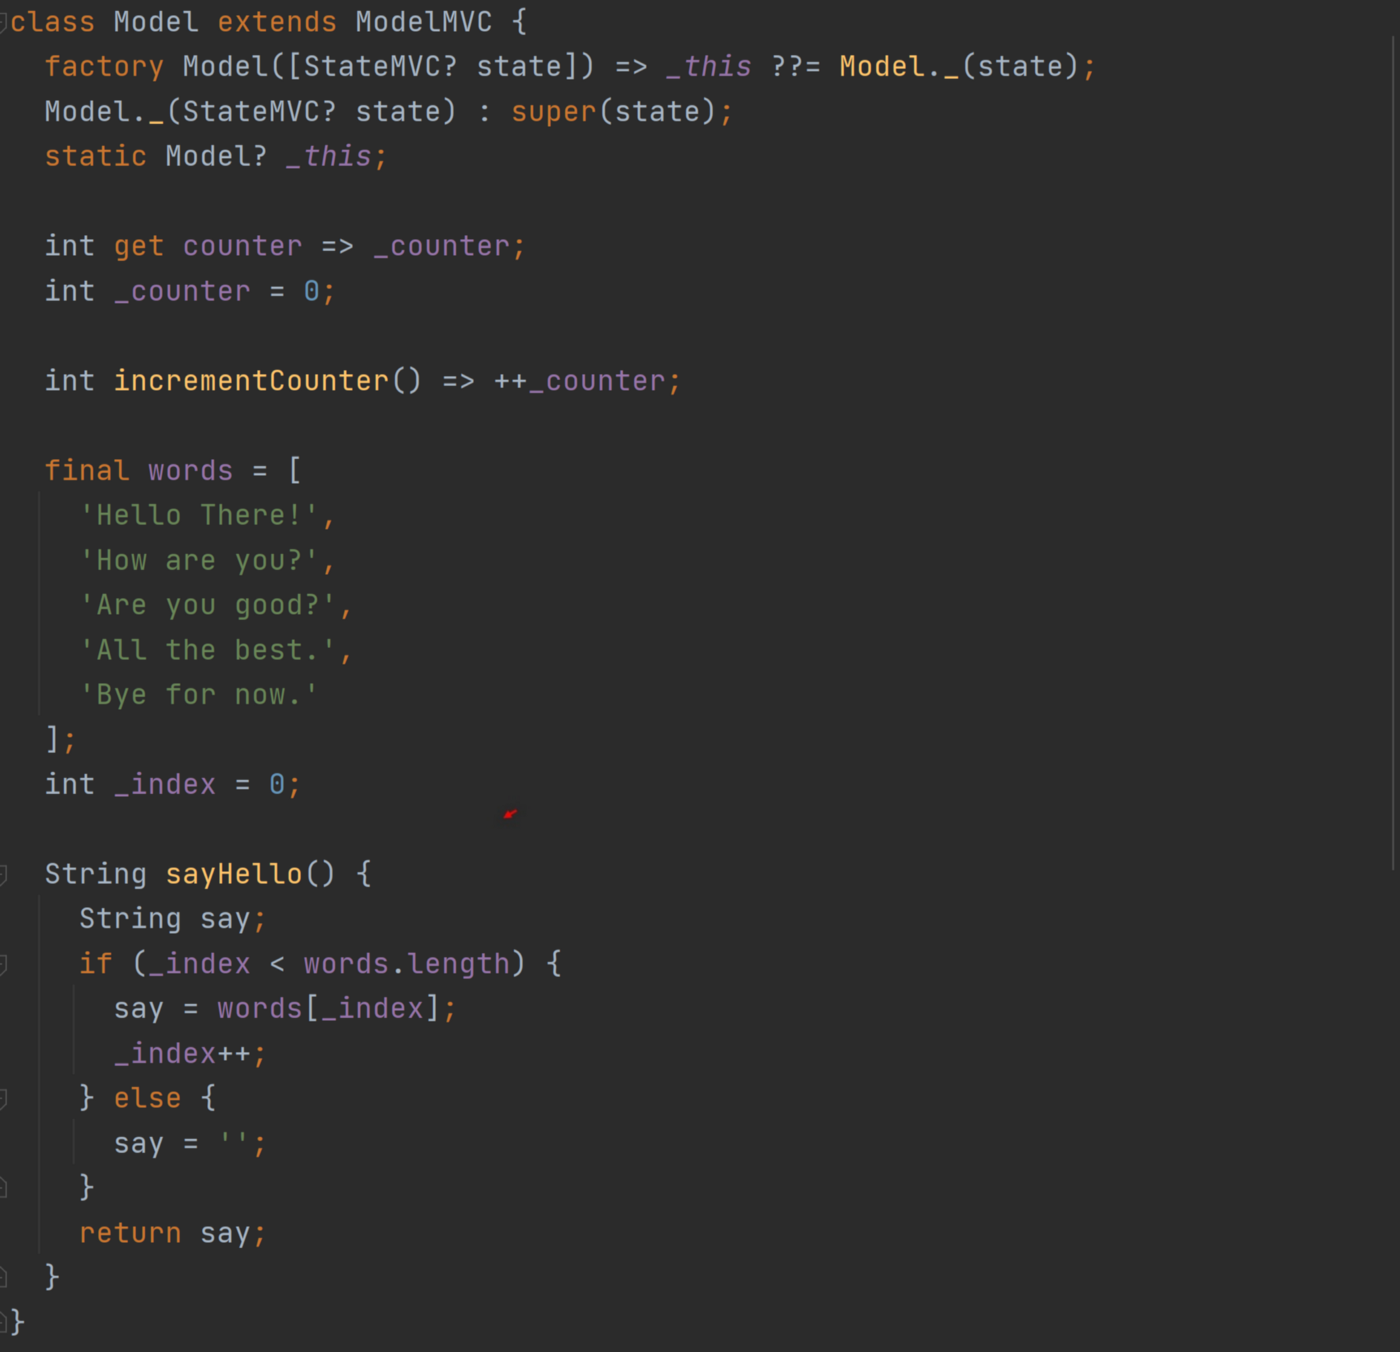
Further along in the _MyAppState class, we see its build() function. Well no, we see its buildChild() function to implement the built-in InheritedWidget and FutureBuilder.
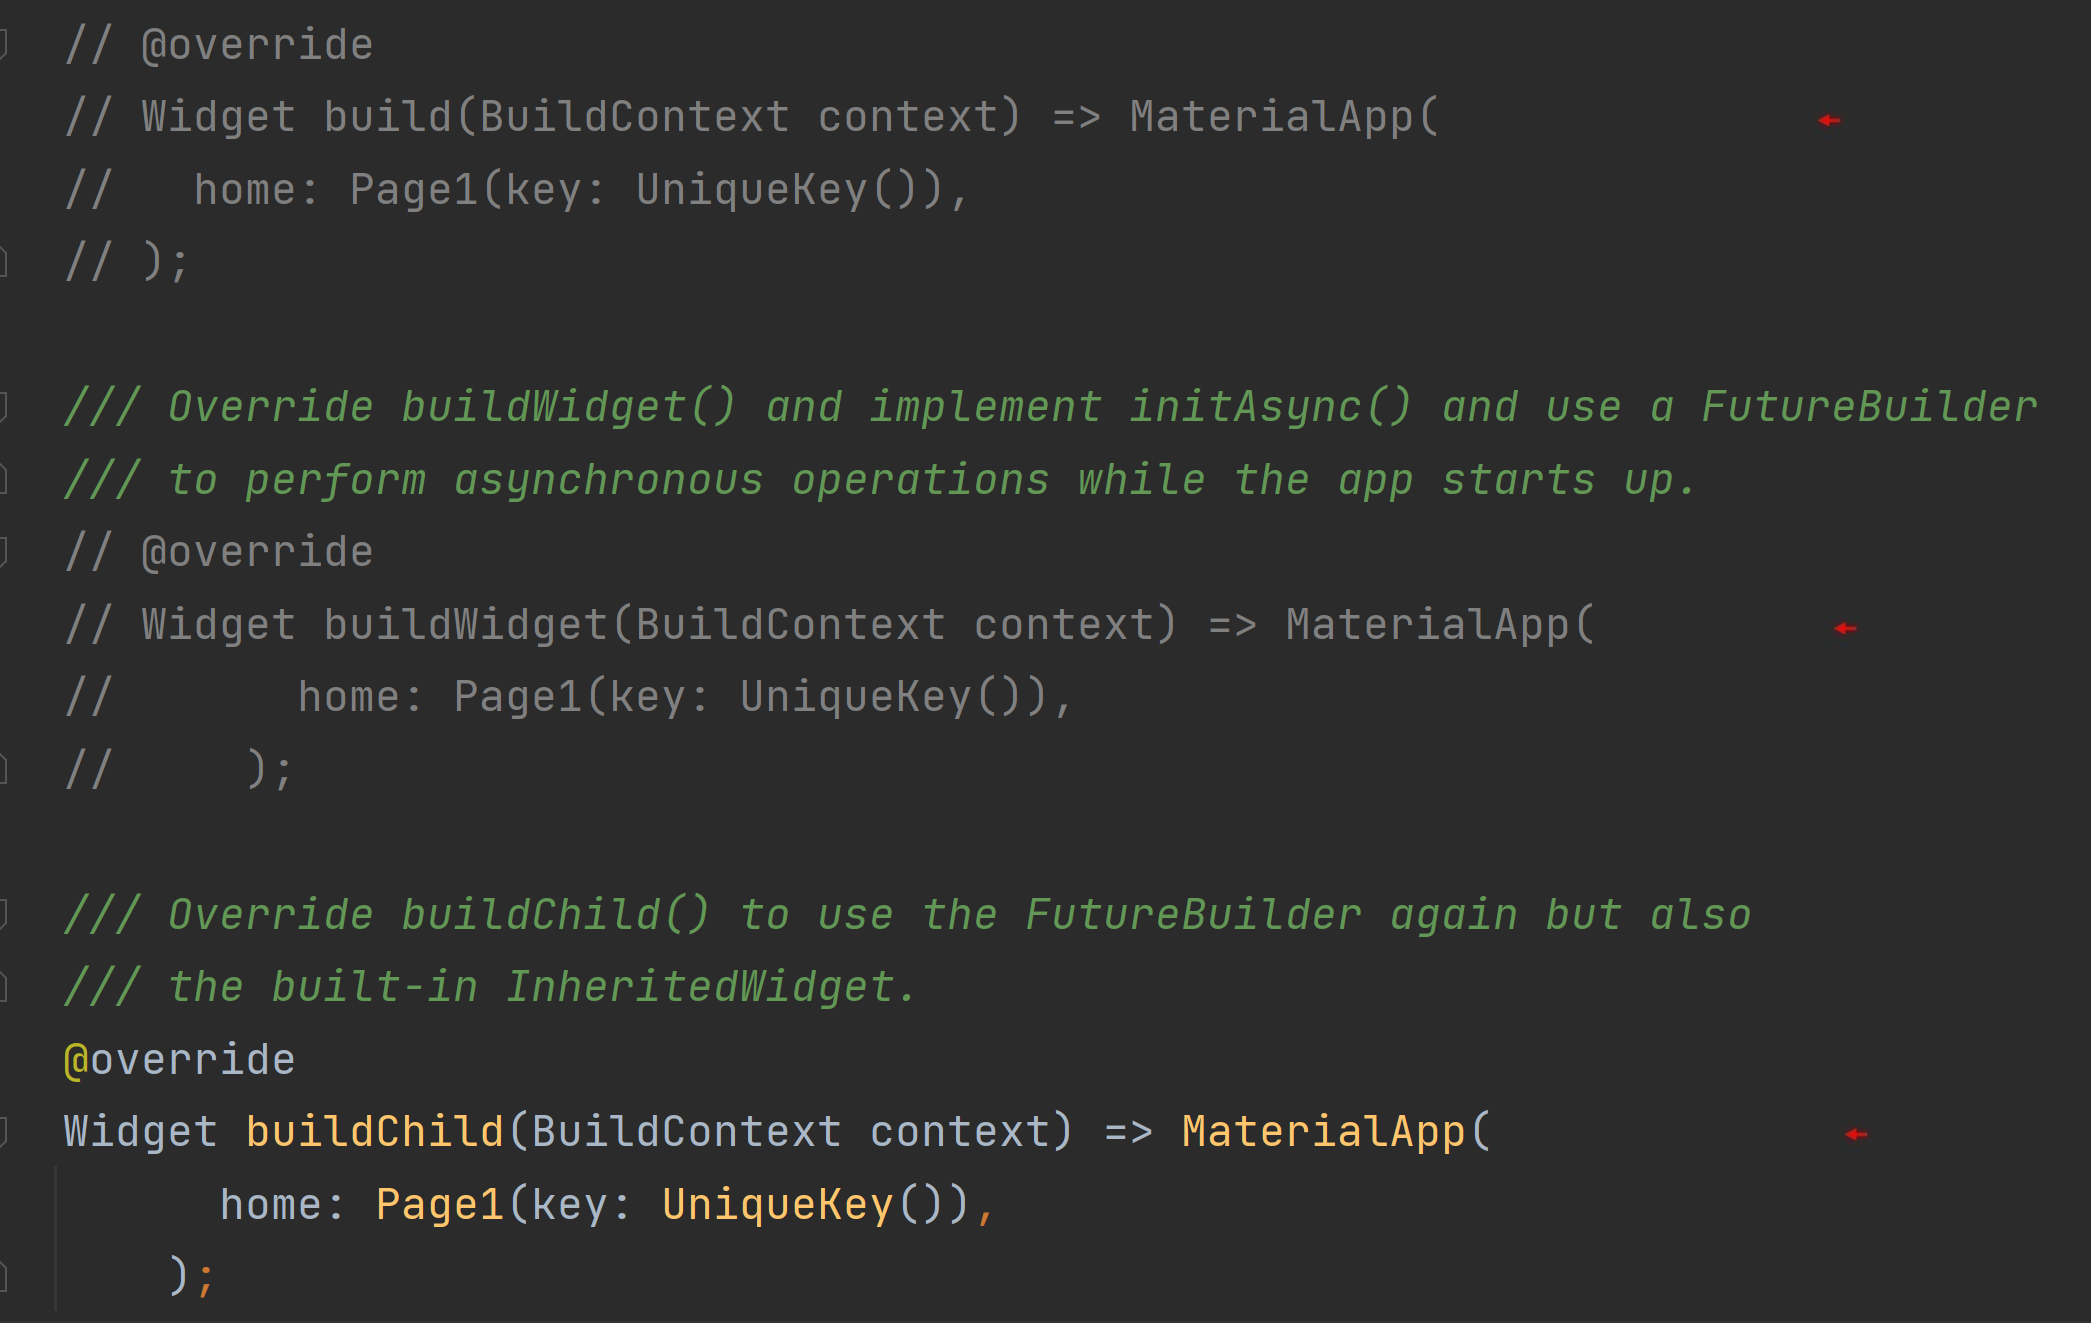
Again, you’re free to override the build() function if you must. However, as you see below, it’s currently implementing the ‘InheritedWidget’ where it then calls the buildChild() function. Spontaneous rebuilds of small areas of the interface here and there have proven the most efficient approach for some of my more ‘busy’ apps.
The State of Being
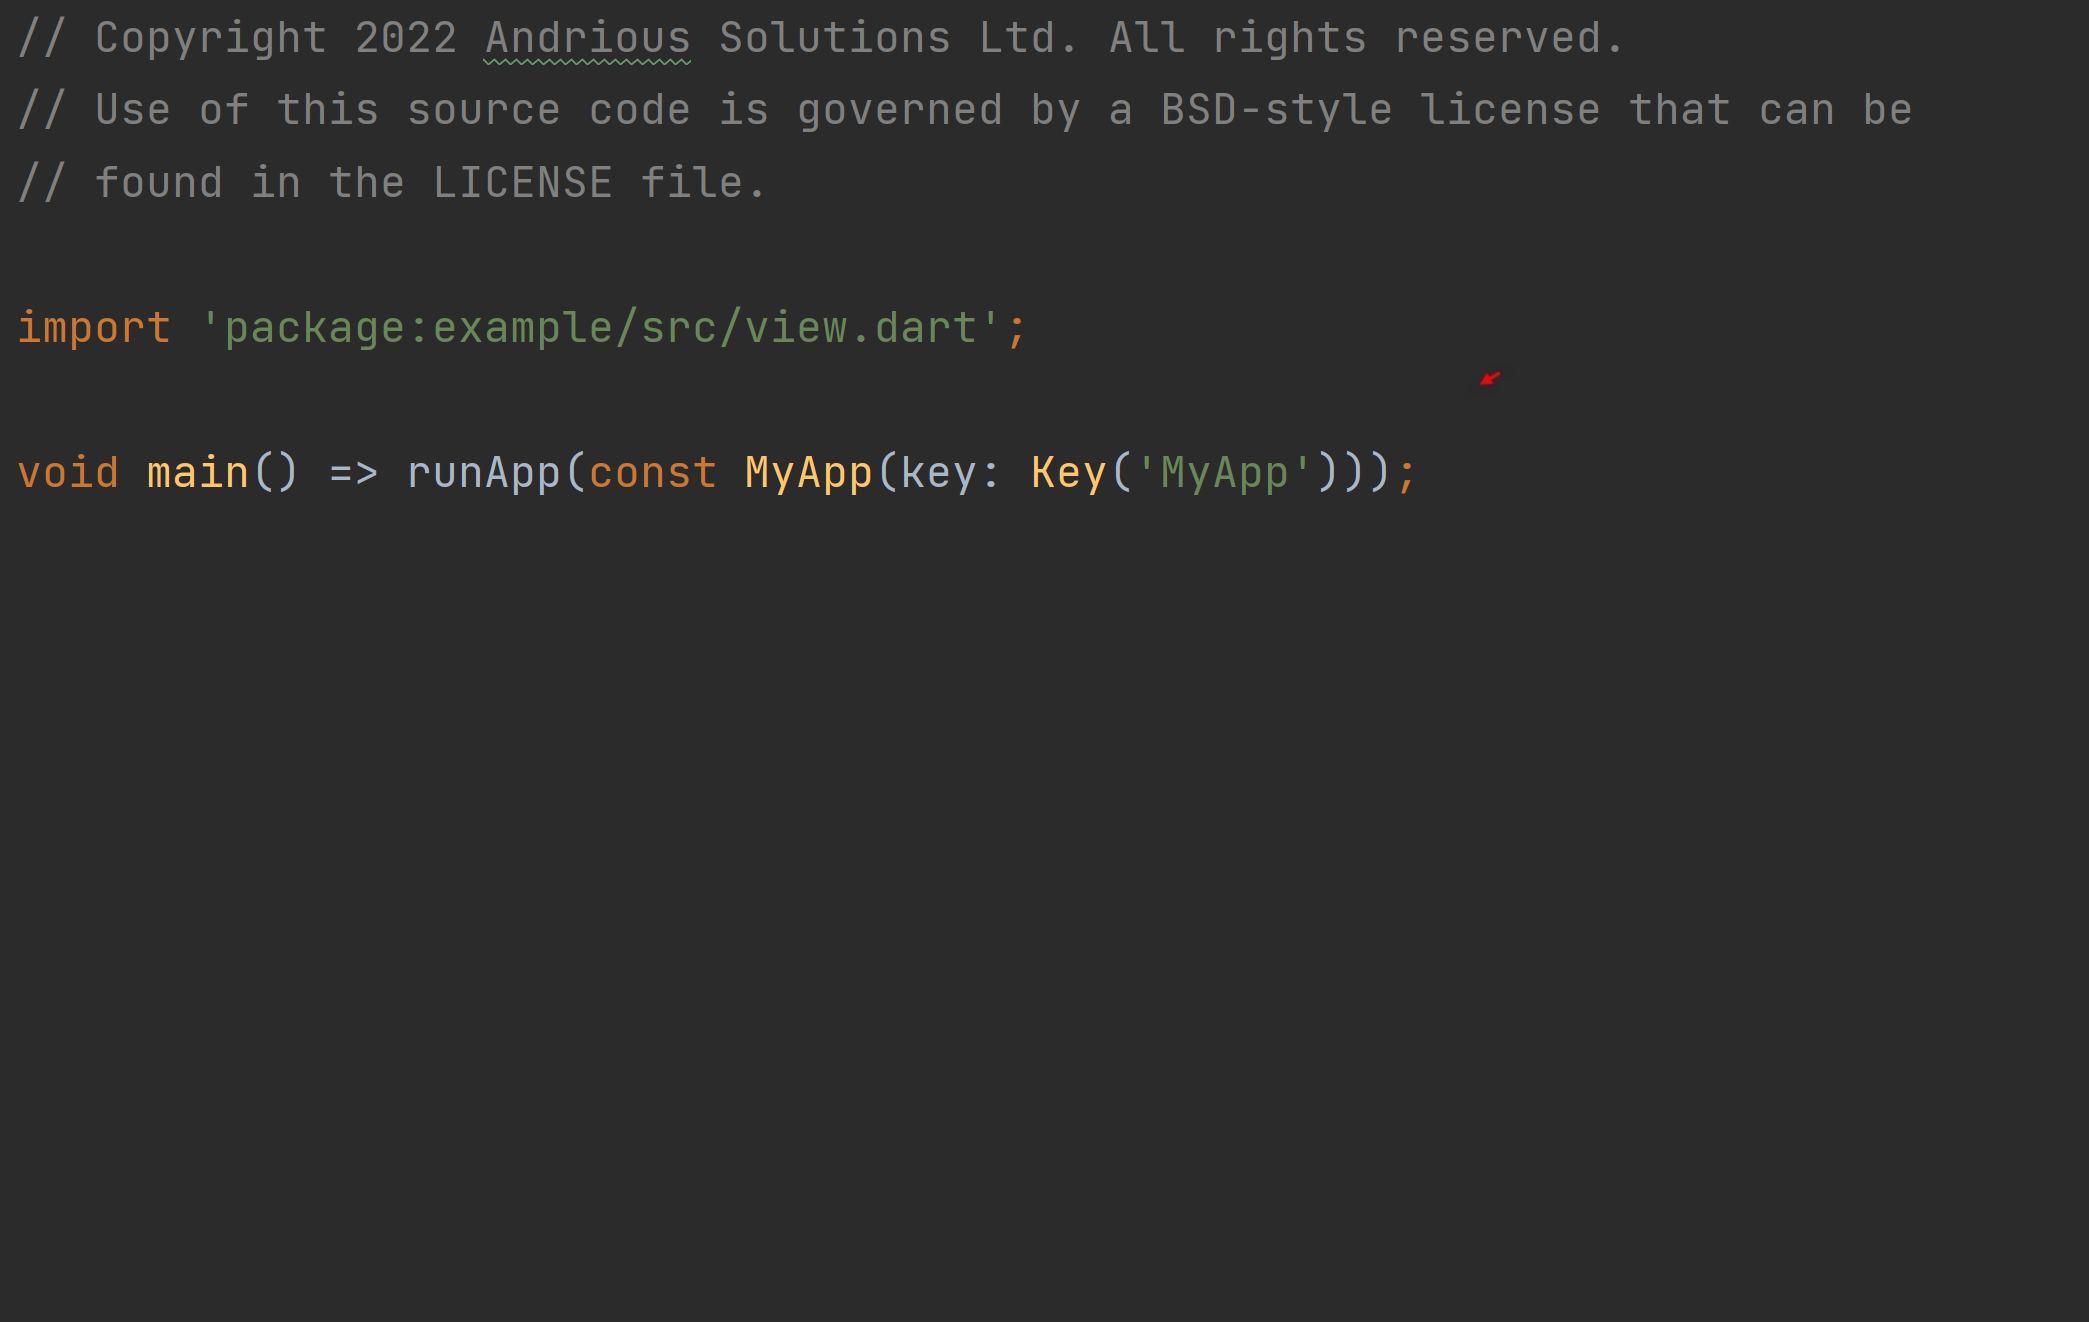
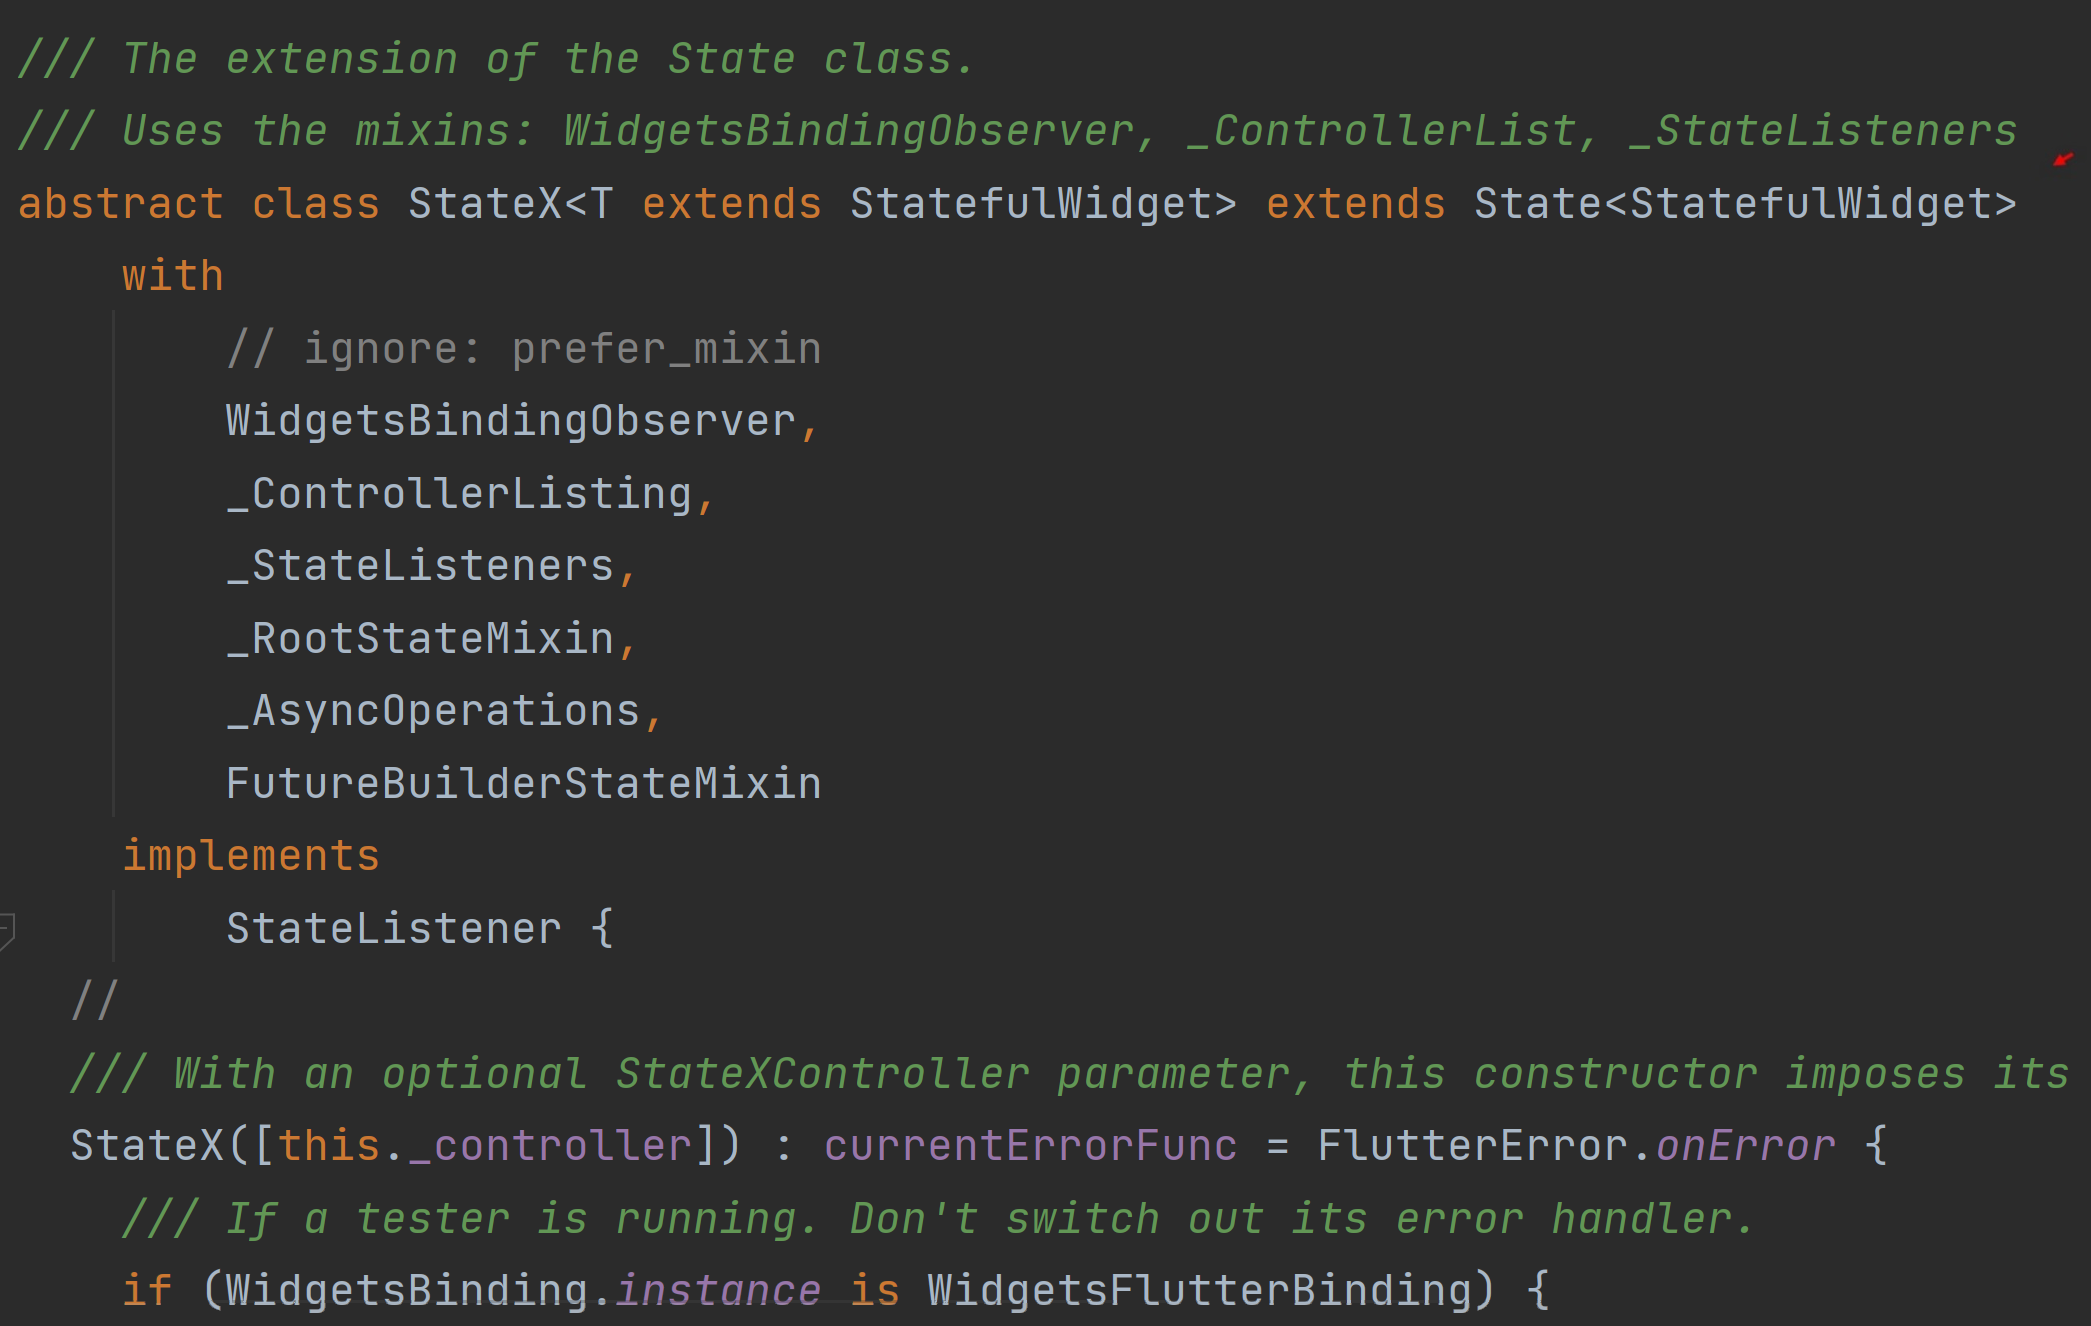
Again, looking right back to the beginning of the example app, the MyApp StatefulWidget is passed to Flutter’s runApp() function. See the first screenshot below. The third screenshot displays its accompanying State class, _MyAppState, extending by the AppStateX class.


This class is included in the state_extended package and is a subclass of the InheritedStateX class which, in turn, is a subclass of the StateX class. As such, this allows your app to utilize a built-in InheritedWidget, if you want. We won’t get into the code here. I’m just showing the class hierarchy below.

A State of Your Own
Of course, it’s not mandatory you start your Flutter app with the AppStateX class object — just use StateX objects if you want. However, you’ll find the ‘first’ State object can be a pivotal player in a Flutter app. Many times, it’s this object that will supply the overall functionality and ability of the particular app. Being situated near the base of the Widget tree, it’s then accessible throughout your app, and can then assist in providing the functional requirements of a Flutter app. Finally, of course, it allows for a built-in InheritedWidget. Using the AppStateX class would be a good choice.
TL;DR
Test the Tests
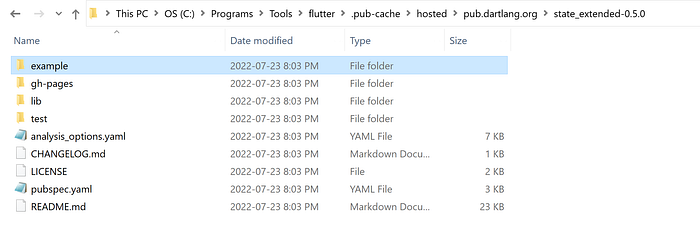
Here’s a neat little exercise. Every time you use a new Dart package, it’s downloaded to your machine, right? On my Windows machine, for example, all the Dart packages I’ve ever used are installed where I installed the Flutter SDK under the following directories, .pub-cache\hosted\pub.dartlang.org\
Create a new Flutter project, and to make things easier, simply name it, example. Next, install the custom package by introducing it into that project’s pubspec.yaml and issuing the command, flutter pub upgrade.
After that, seek out this Dart package under the directory, pub.dartlang.org, and copy the contents of its directory, example, back to your new project. Paste the contents to your new Flutter project overwriting its lib directory and all its files. Every published package is required to include an example app with its deployment. I would think you can do this with any and all Dart packages you’re using.
Now, your new project’s pubspec.yaml file was just overwritten, and the example app’s pubspec.yaml file was referencing the custom framework using a relative directory path. You will have to delete that line or comment it out and make some changes to reference the latest published version — as it was done in the screenshot below.

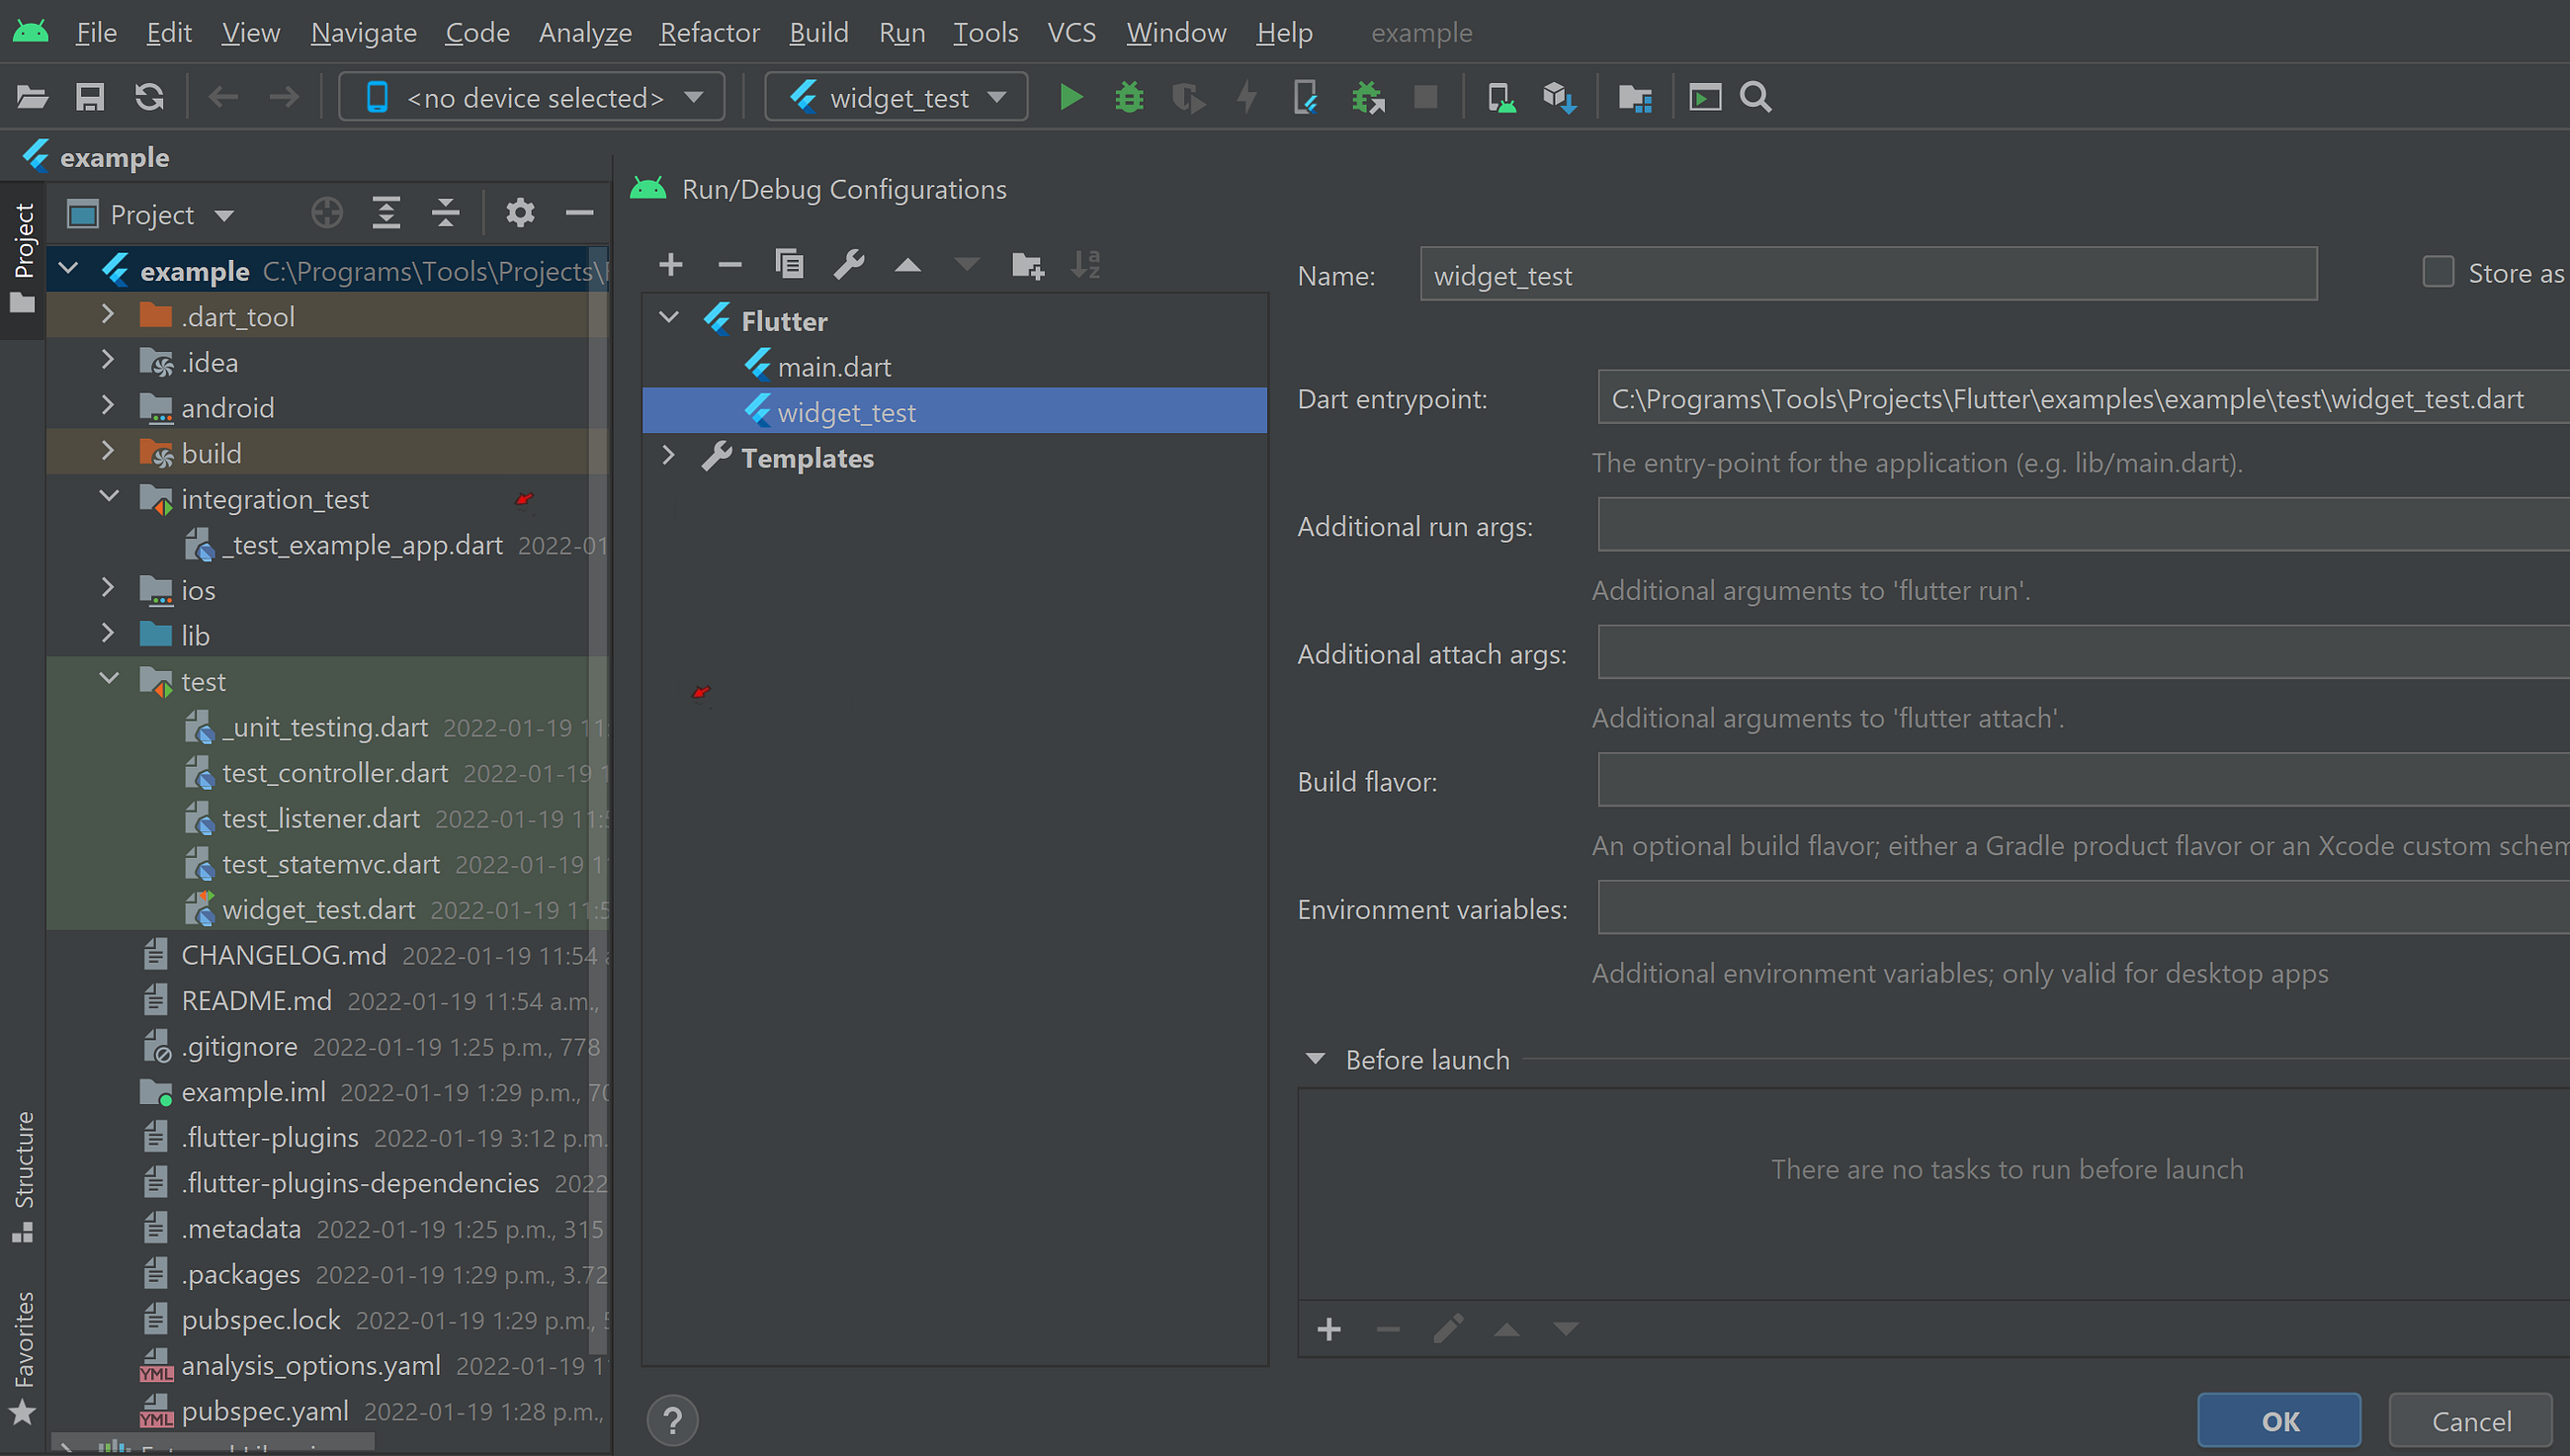
Depending on your chosen IDE, create a new ‘Flutter App’ configuration and not a ‘Flutter Test’ configuration pointing to the library file,test/widget_test.dart.The screenshot below is that of Android Studio. Note, this all is under the assumption you’re familiar with your IDE’s debugger. Surprisingly, there are a lot of developers out there ‘programming blind’ — they don’t use a debugger. I know! How?! In my opinion, if you’re not stepping through your code, you couldn’t have any confidence in it. Anyway. That’s a whole series of articles in its own right.
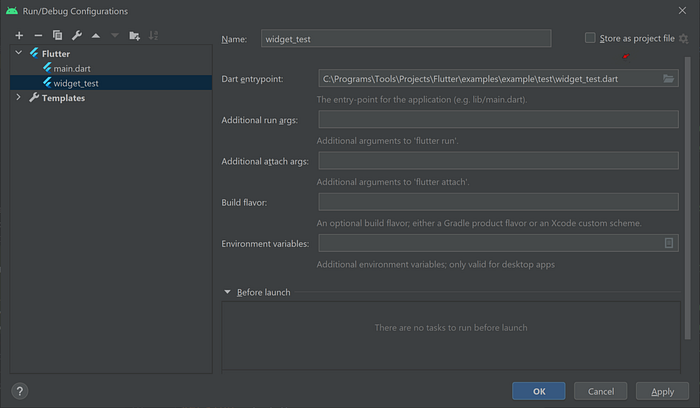
Run/Debug Configuration in Android Studio
A Test Run
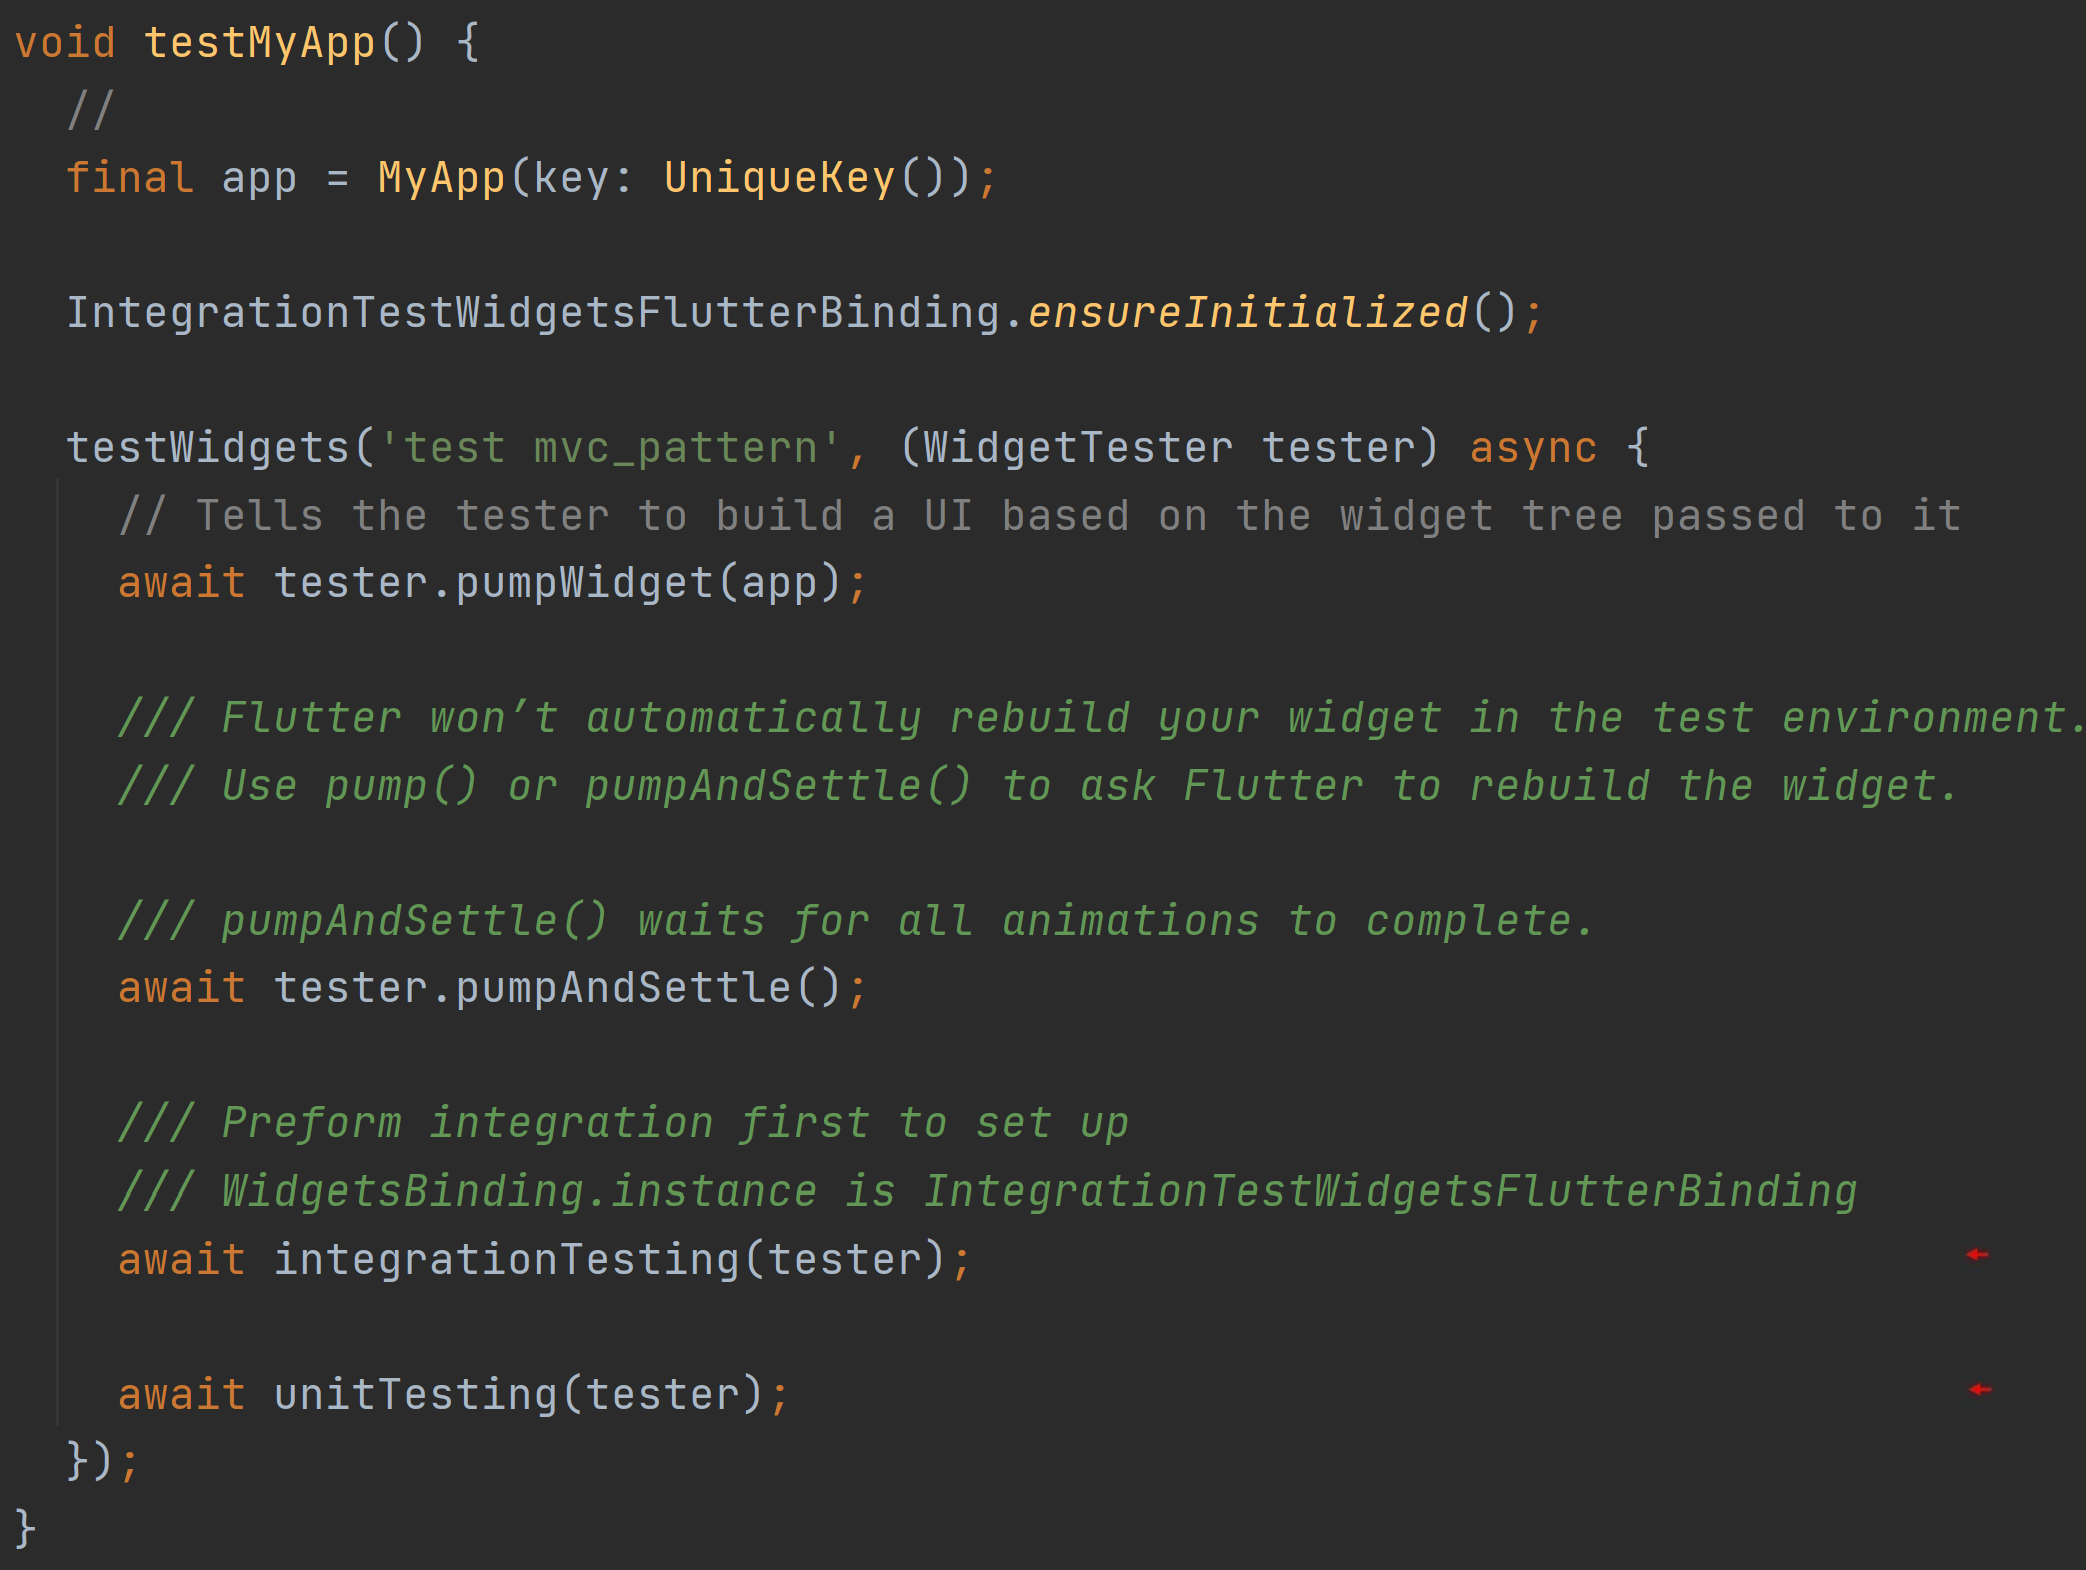
Now, when that’s all done, run it! In the gif file below, you see the integration test is taking the example app through its paces. In the end, your IDE’s console window will display, ‘All tests passed!’ Note, however, that there’s some unit testing is going on as well. By convention, you’re to place your integration tests under the directory, integration_test, and your unit tests under the directory, test. See below.
Take A Break
With that all set up, you’re free now to set ‘breakpoints’ in the code and really get an appreciation of the inner workings of the state_extended package. If you don’t use breakpoints much, I feel you should. Again, stepping through your code and utilizing breakpoints in my opinion will only ensure your code is the best it can be.
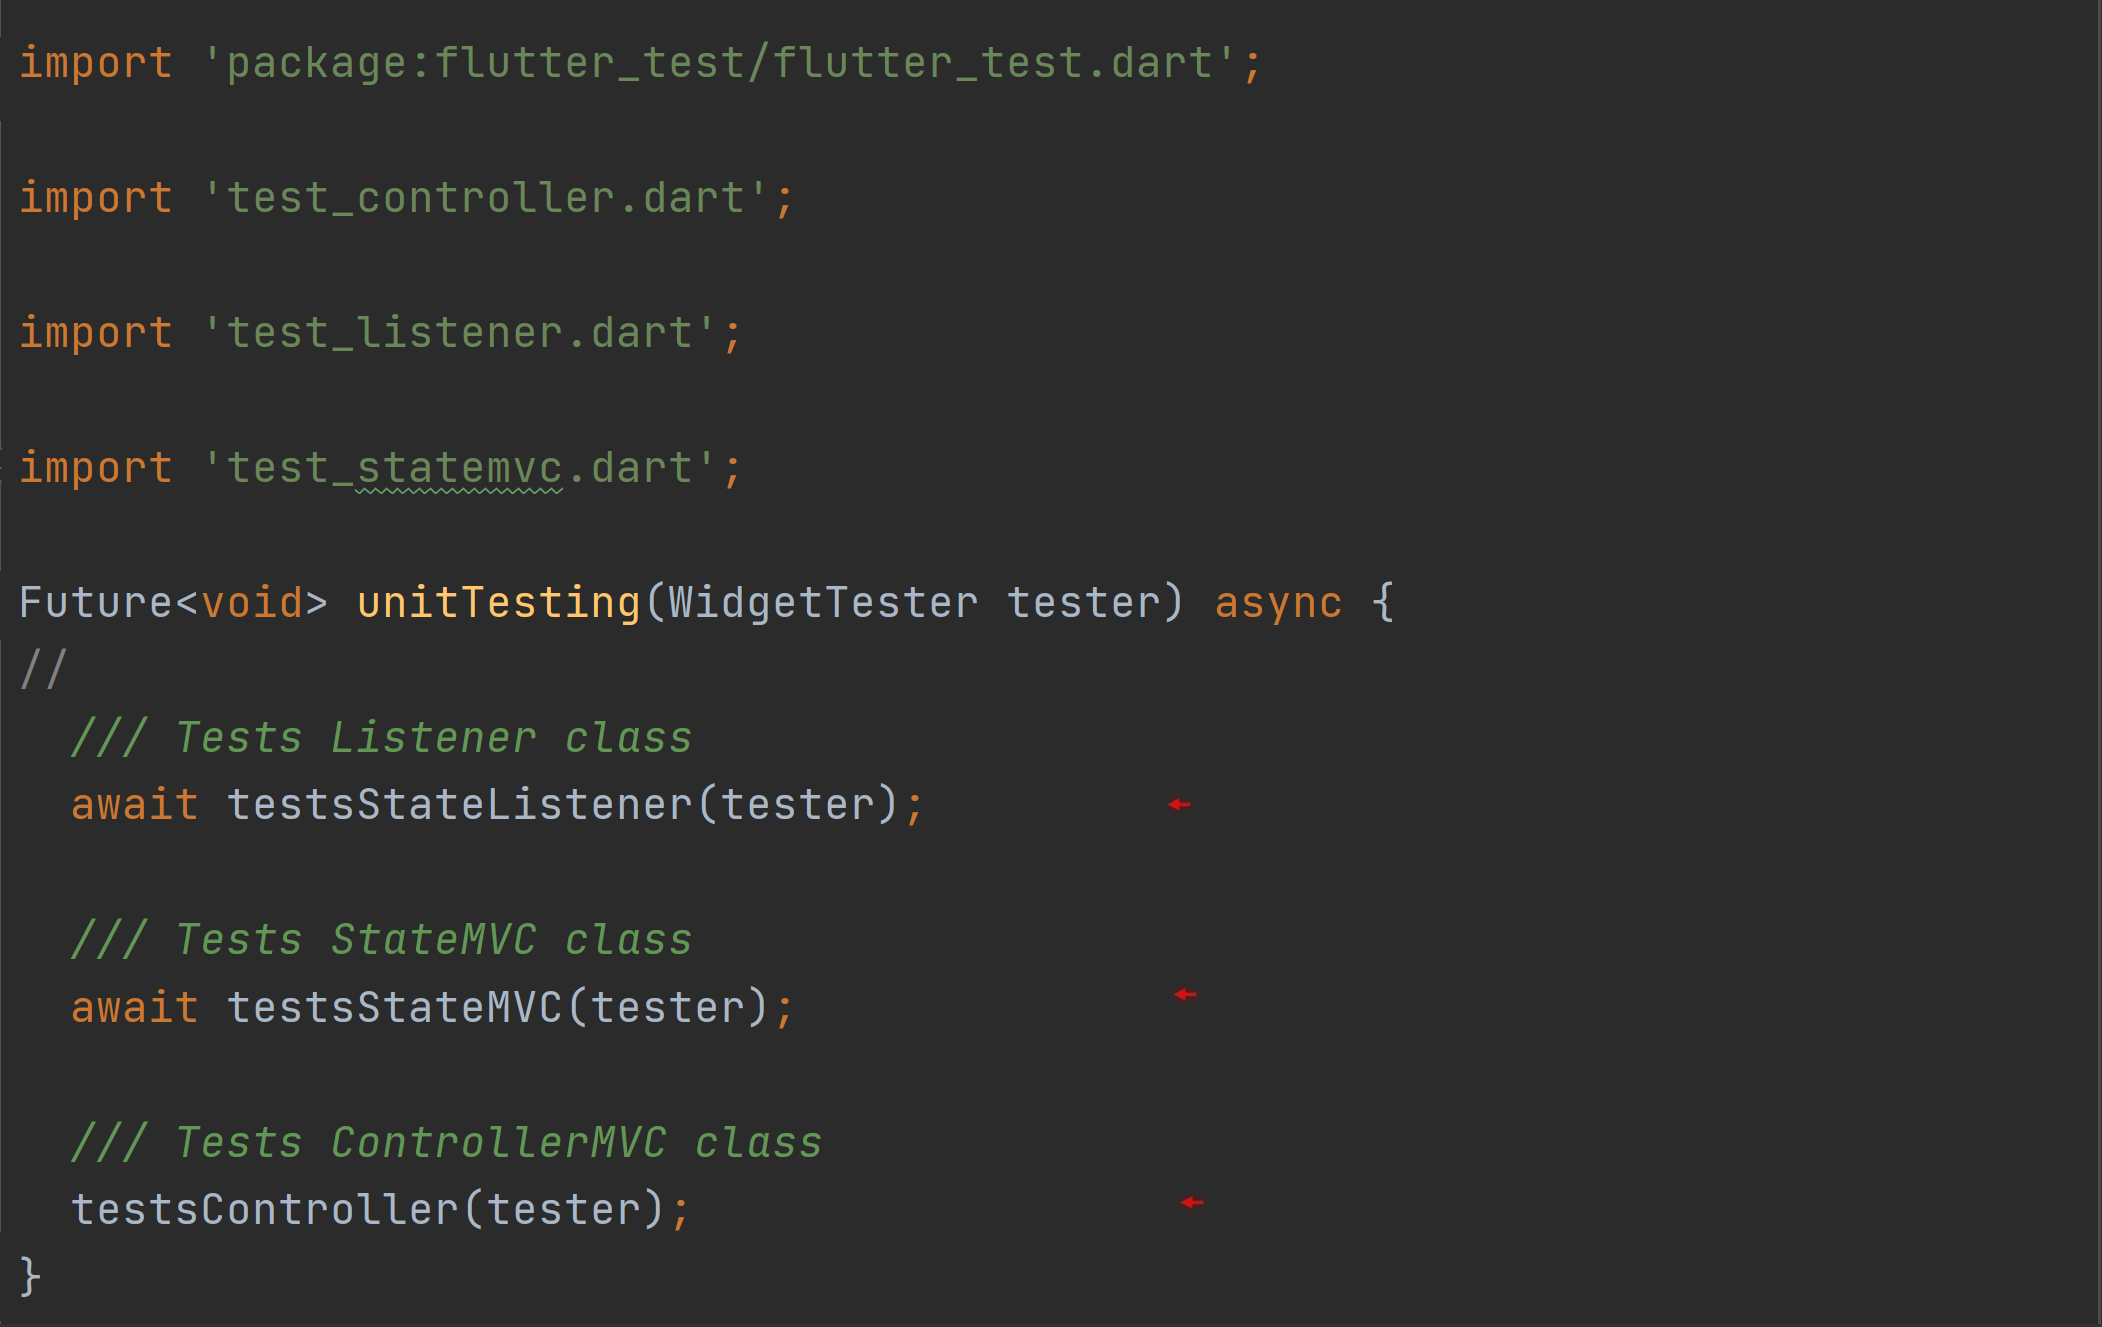
Anyway, the first screenshot highlights both the integration testing and the unit testing — both are high-level functions each in their own library file. The second screenshot is that of the unit testing with the particular players in this framework further broken up into separate files: one tests the ‘State Object Controllers’, one tests the StateX objects, and one tests the ‘State Listeners.’ As the name implies, Listeners are triggered by particular lifecycle events for a typical Flutter app. Unlike controllers, they can’t disrupt or affect the lifecycle event by stopping it for example. They can only run a bit of code a developer may have placed there when particular events occur. Not used much, but maybe is a topic for another article.
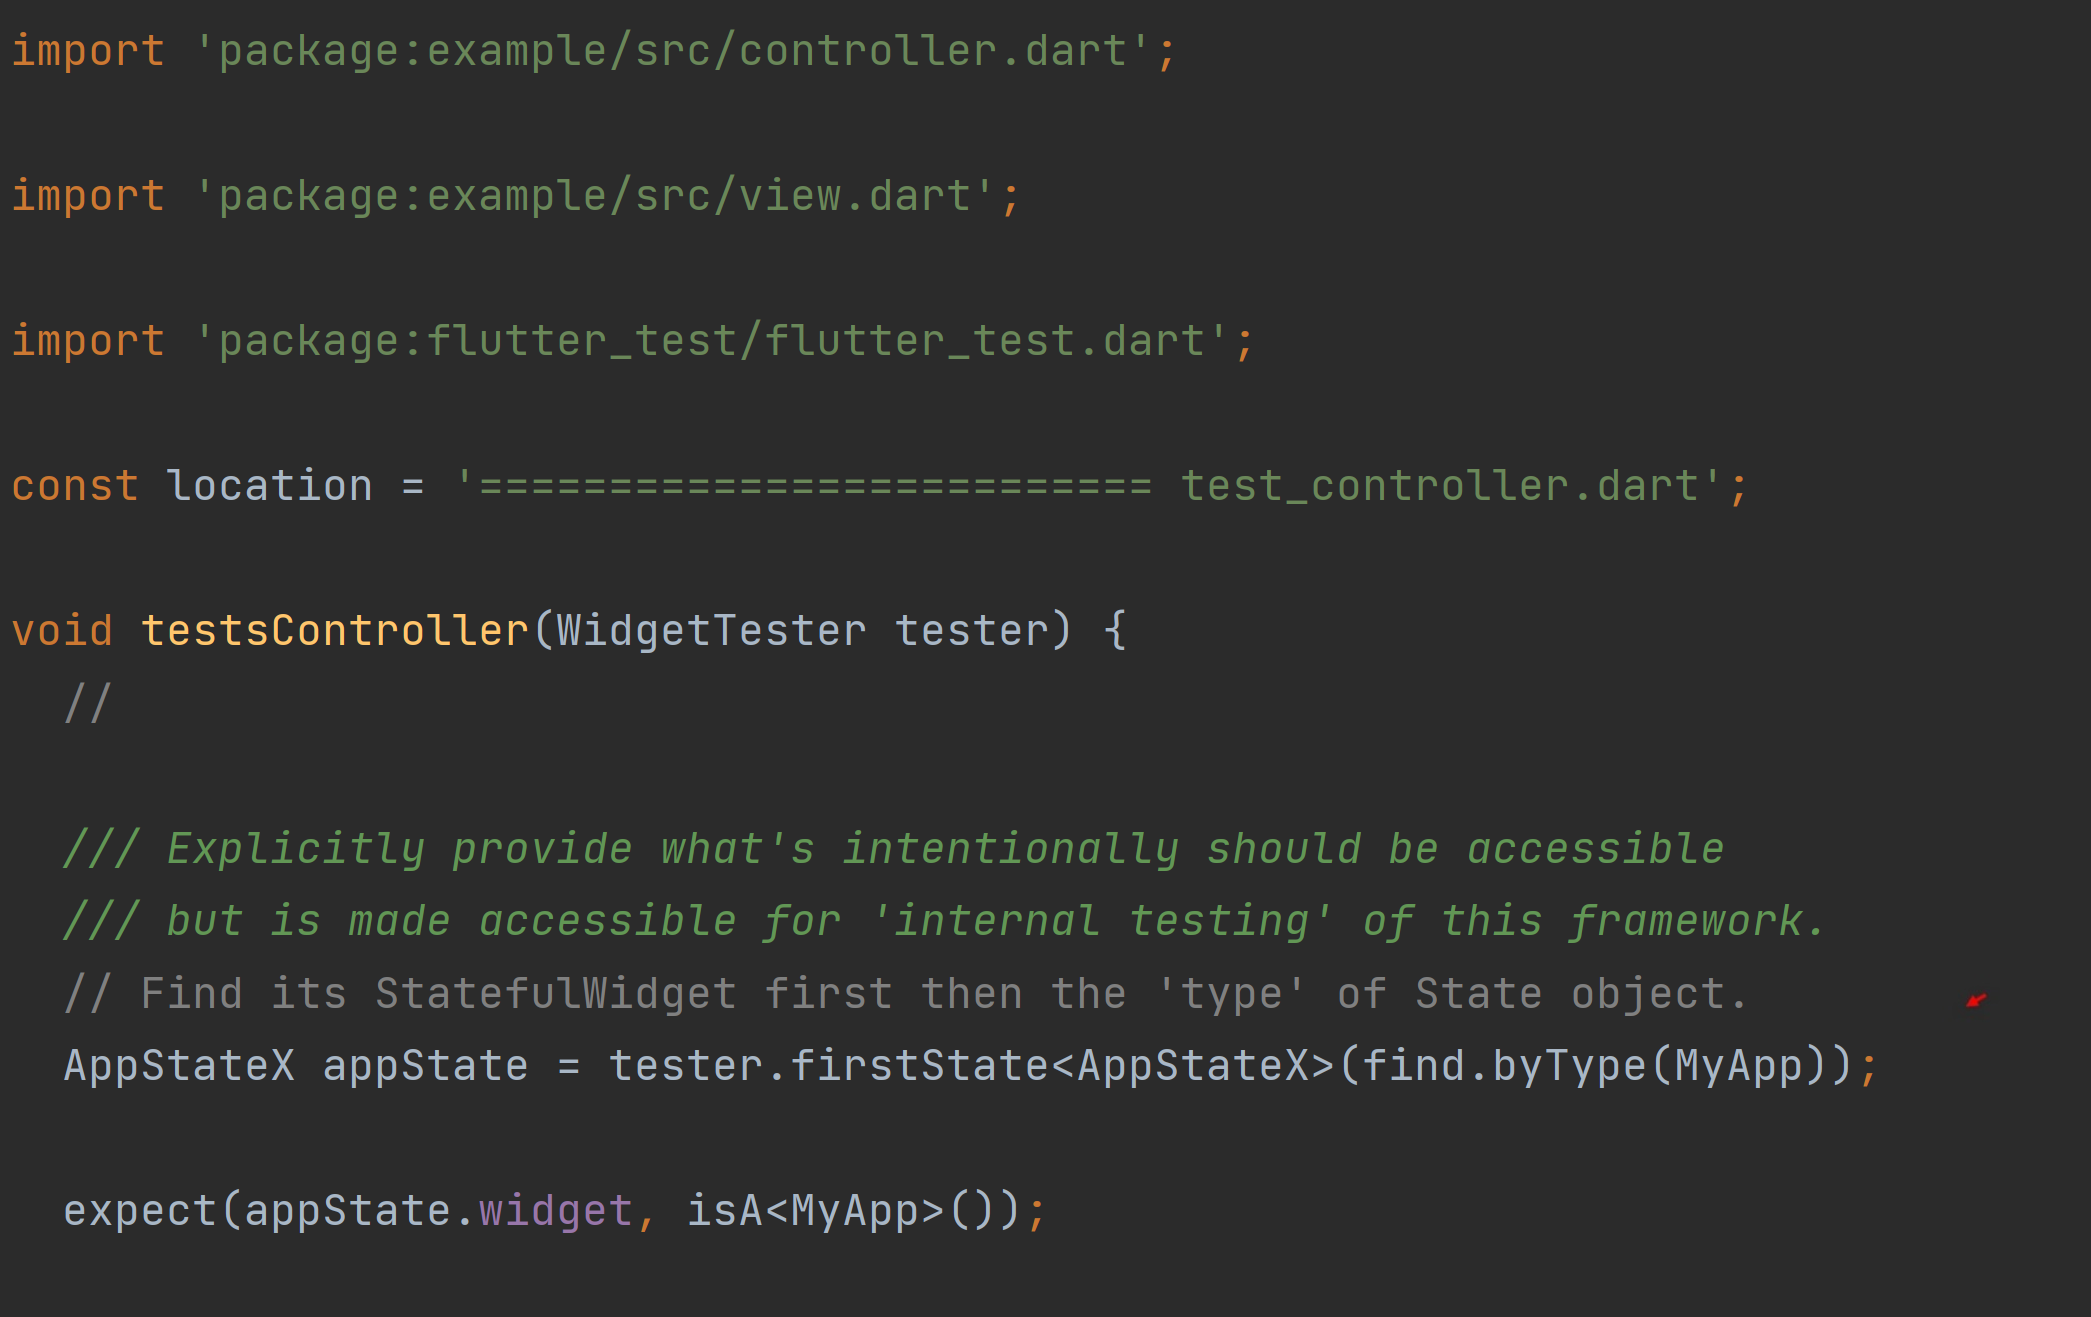
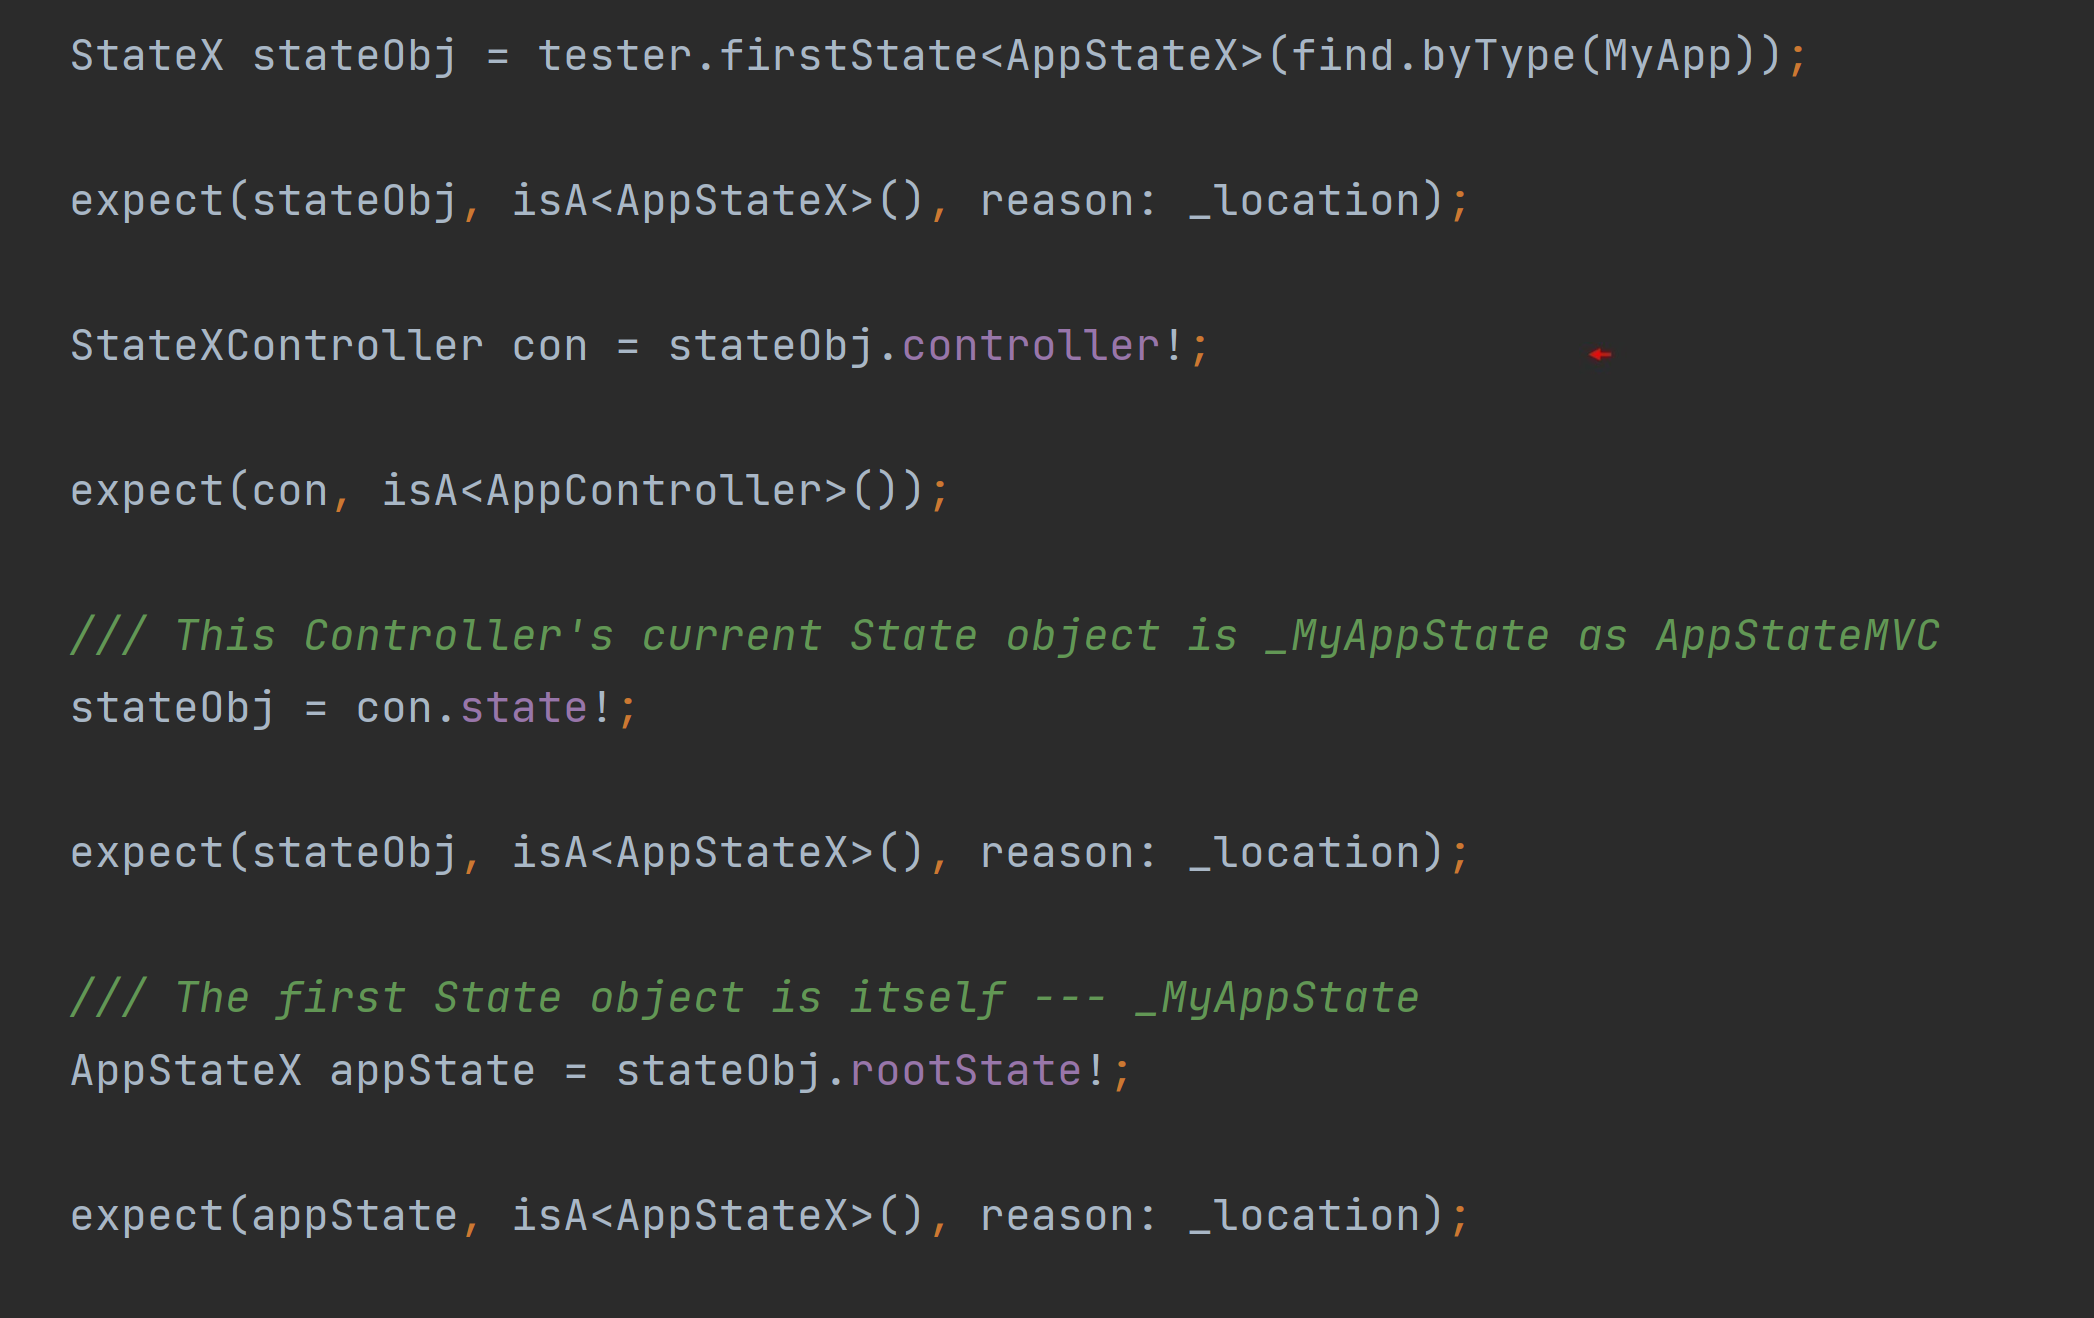
The high-level function, testsStateX, test the functions and features of the StateX class. The beginning of that function can be seen in the first screenshot below while the beginning of the function, testsController, is in the second screenshot testing the capabilities of the StateXController class. Highlighted in both screenshots is the function, firstState(), from the object, tester. It’s an instance of the WidgetTester class that’s part of Flutter’s test environment, and it’s the ‘first State object’ from the app which, when using this framework, will always be of the class, AppStateX. Something to keep in mind.

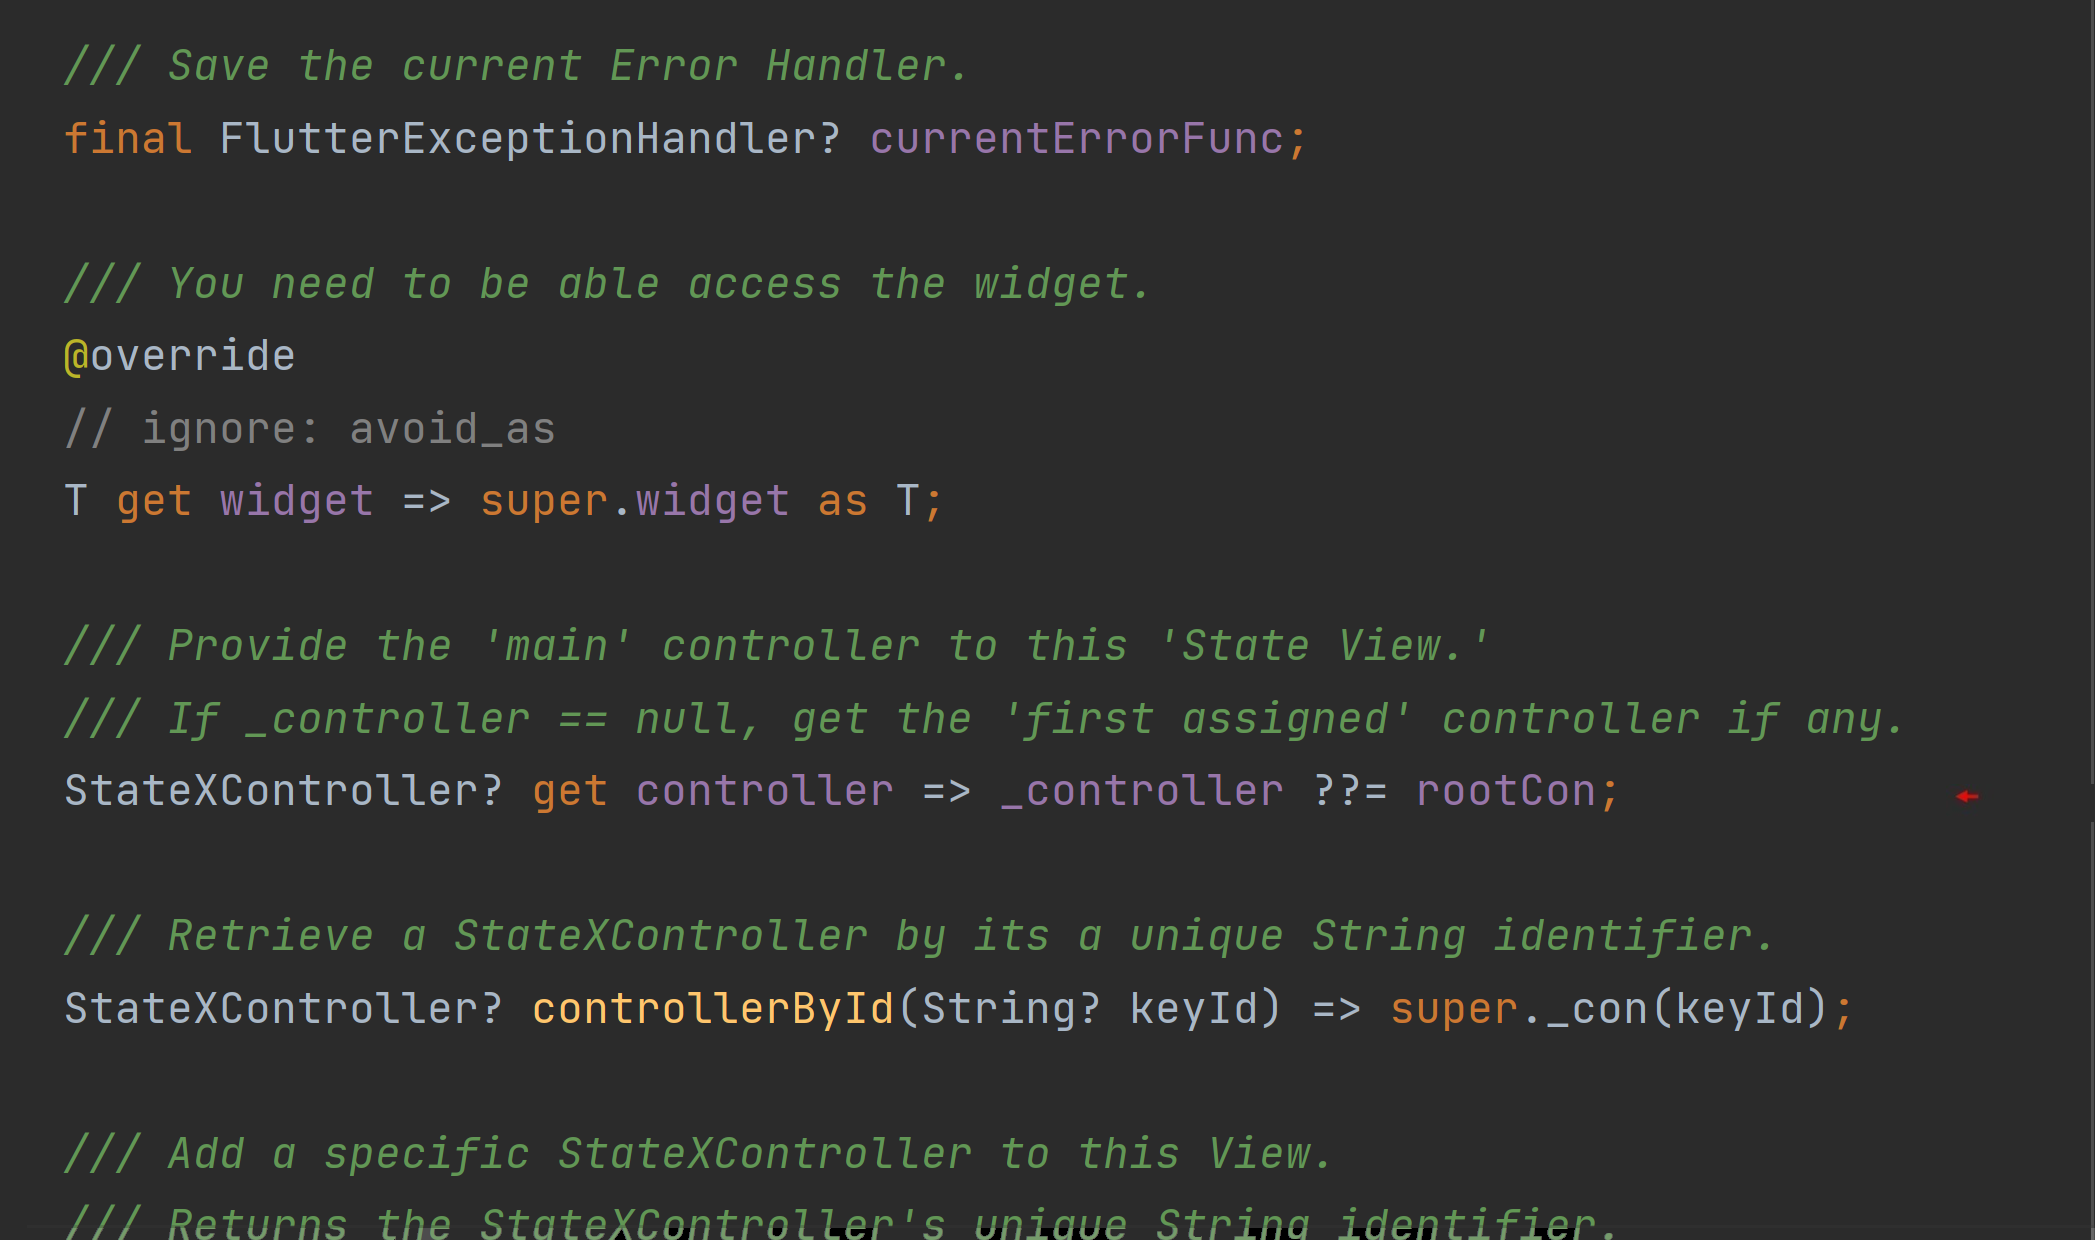
As I’ve stated, this is a great means to understand this framework (never mind the Flutter framework itself). For example, in the first screenshot below, a breakpoint is placed in the high-level function, testsStateX, at line, 23. Running the configuration again, looking now at the second screenshot below, the IDE will suspend execution at that line allowing you to then step through the code and discover the property, controller, is, in fact, a getter and returns the State object’s ‘first’ state controller. See how that works?
Made Easy
The StateX class makes my Life as a developer a little bit easier. It works like Flutter because it works with Flutter to supply the Flutter widgets and their objects you already recognize and need to provide a responsive and efficient app. Step through the test code above to understand how to best take advantage of the state_extended package, and by virtue, take advantage of the Flutter framework itself.
Cheers.
Next article…